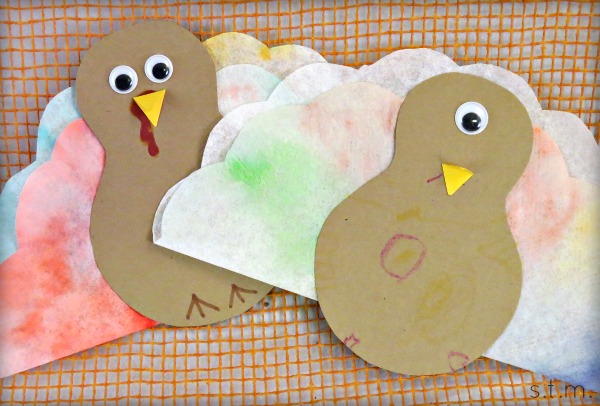
My son and I had a great time making these cute little coffee filter turkeys (or in his case, cyclops turkey monster) last year right before the holidays, so I wanted to share this quick, colorful and child-friendly craft with all of you this year. I hope you and your little one(s) have fun too!
Materials:
- Non-permanent magic markers
- coffee filter
- scissors
- glue
- google eyes
- brown and yellow construction paper
- downloaded turkey body pattern
- spray bottle with water
- iron (optional)
- small magnet circle or strip (optional)
How to make it:
- Flatten a coffee filter, then fold it in half four times so that you end up with a wedge. Using scissors, cut a curve at the top of this folded filter.
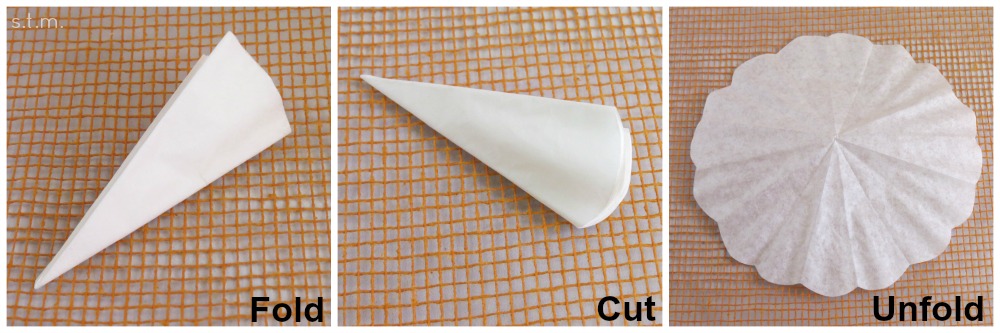
- Unfold the cut filter completely and let your child color all over it with markers. The more color the better.
- Lightly spray the filer with water and set aside to dry. This will mix and mute the colors on the filter. If the filter doesn’t dry quickly enough, you can use a hot iron to speed up the process. (Parents, please use caution with hot irons around children. This optional step is best left to the grownups.)
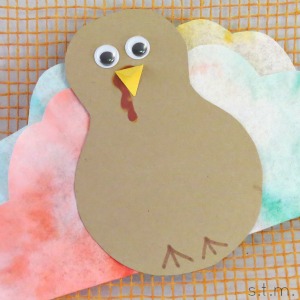
- Fold the dry filter in half so that one side is slightly lower than the other and the curved parts of the edges don’t quite line up. This will be the finished turkey tail.
- Using the downloaded turkey body pattern, cut a body from the brown construction paper.
- Next use markets to color a red wattle (for you city folks, that’s the red wrinkly thing that hangs around the beak) and brown or black feet on the body.
- Cut a beak from the yellow construction paper and glue it on.
- Glue on two (or how ever many your child might like) google eyes so your turkey can see.
- Lastly glue on the folded turkey tail. It’s best to put a dab of glue between the two tail layers also.
- If you want to proudly display your turkey on the fridge, simply add a magnet to the back after everything else has dried.