Oh my goodness, it’s almost Easter and I feel like I’m so far behind. It seems like St. Patrick’s Day was just a couple of weeks ago. . . Oh wait, it was! With Easter’s early arrival and our spring break adventure last week, I’m afraid all the holiday hoopla has simply taken a backseat to life. Not that I’m downplaying the importance of Easter and the resurrection of Christ, but let’s just say that I’ve been a little lax in my outward display of enthusiasm. Anyone else in my shoes this year?
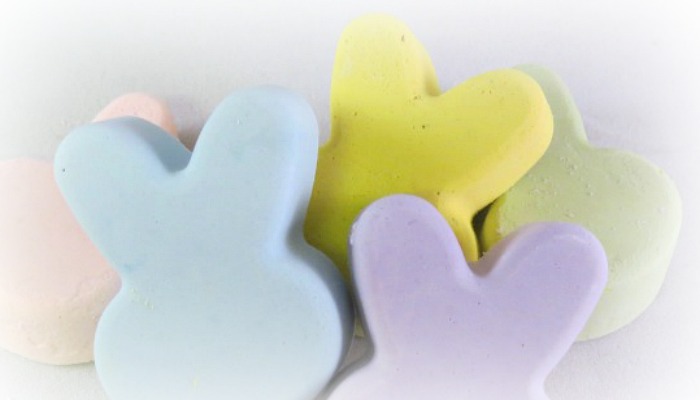
Okay, so enough of my excuses. We all still have time to whip up a few items just in time for Easter, and this adorable little bunny sidewalk chalk definitely fits the bill. I love this craft because it is easy to make, it fits into many plastic eggs and kids love them. Winner, winner, bunny dinner!
Here’s what you need:
- Silicone Mold (bunnies, chicks or Easter eggs are all good choices)
- Plaster of Paris
- Water
- Tempera Paint
- Disposable cups and spoons
Here’s what you do:
- Mix equal parts Plaster of Paris and water in a disposable cup.
- Add paint to the mixture and stir until you get the desired color. Of course, the more paint the deeper the color.
- Pour the colored mixture into the molds. Fill it close to the top, but don’t overflow or you will have to trim off the excess (and that definitely would add oodles of unnecessary work to this super easy craft).
- Let the mold set on a level surface until dry, which will take several hours. Your Plaster of Paris container probably will give you an estimated time.
- Pop out the little chalks and let them continue to dry for at least a day. You will know when they are completely dry when they are no longer cool to the touch (not that you have to wait quite that long).
As a side note, if you plan to package these fun little chalks in a sealed container, you may want to let them dry longer. I plopped mine in mini baggies and they were a bit moist when I handed them out to the kiddos in the Hollow. The kids loved them but the chalks didn’t seem to last as long. Also, make sure you wash your mold immediately or you might have a hard time getting it completely clean.
Okay, I think that’s it. Enjoy your sidewalk chalk and have a happy Easter!