Category: In the Kitchen

Recipes and edible ideas from my kitchen. All these yummies are tested before being posted.

Jell-O Playdough, Recipe for Homemade Fun

Jell-O Playdough, Recipe for Homemade Fun


playdough1

We finally tried the Jell-O playing dough thing this weekend, and mom and son gave it two thumbs up. . . oh, and also dad, because he actually gave it the taste test since it smelled so good (not like he snacked on it, just a nibble). We used the recipe from Modern Parents, Messy Kids, but I have seen similar recipes all over the web.

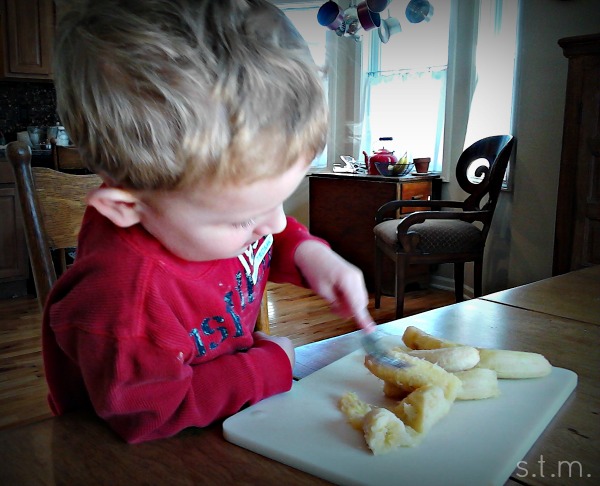
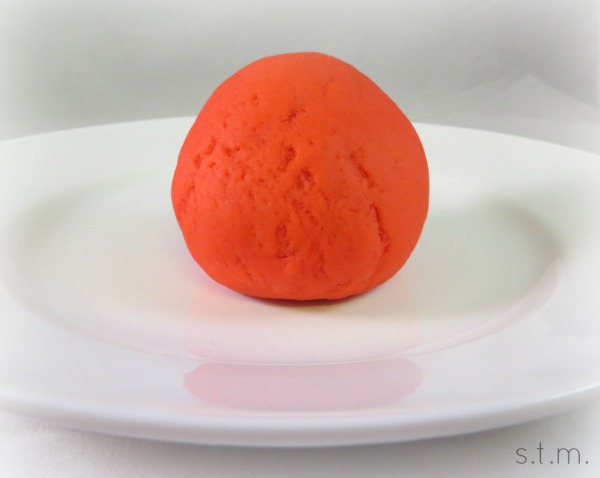
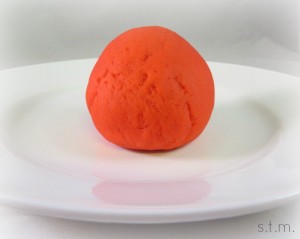
We made raspberry dough because I had it on hand, which made the pinkish red colored dough that you see here. My son enjoyed mixing all the ingredients together, but quickly tired of the stirring and kneading steps; although he magically reappeared for the play/testing phase. The cooking process didn’t take that long, just remember to keep stirring until you really can’t stir any longer. Also, I probably kneaded an additional cup of flour into the dough to get rid of the stickies, so just keep “kneading it in as needed” (ha, get it). When it was finished, I admit I was completely surprised by how much it actually felt like the real thing, and this recipe makes enough for at least a couple of kids to enjoy.

playdough2

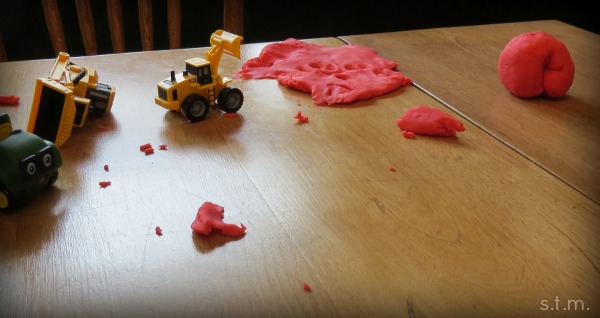
Our son played with his newest creation for over an hour Saturday afternoon, and afterwards, we plopped it into an airtight container and put it in the refrigerator until the next play day. According to Modern Parents, Messy Kids, the playing dough should last at least a few weeks if properly stored in the fridge.

So if you have a hankering for some homemade fun, here’s the recipe you should use:

Jell-O Playdough
Homemade playdough that feels like the real thing.
Write a review
Print
Prep Time
10 min
Cook Time
20 min
Total Time
40 min
Prep Time
10 min
Cook Time
20 min
Total Time
40 min
Ingredients
  1. 1 c white flour
  2. 1 c warm water
  3. 2 tbsp. salt
  4. 2 tbsp. cream of tartar
  5. 2 tbsp. cooking oil
  6. 1 Jello pack (3 oz.)
  7. extra flour for kneading
Instructions
  1. Mix all of the ingredients (except extra kneading flour) together in a small saucepan until the lumps are gone.
  2. Cook over medium heat, stirring continuously until it thickens into a big ball of dough. (Stir until you can't stir anymore.)
  3. Turn out the dough on a flour covered surface, cutting board or mat.
  4. Let the dough cool.
  5. Add flour and knead the dough until it is no longer sticky (1/2 cup to 1 cup of flour).
Notes
  1. The dough should stay good for a few weeks if placed in an airtight container and kept in the refrigerator.
Adapted from Modern Parents, Messy Kids
https://www.smalltalkmama.com/
 Shared at:
Green Willow Pond


Seed Cake Recipe for the Birds

Seed Cake Recipe for the Birds

When the flurries are flyin’ and you’re stuck inside, why not bring a few birds to your window with these homemade birdseed cakes. I had my doubts when I first tried this recipe, but they really are easy to make and the birds love them.

BirdSeedCake

Birdseed Cakes
This one is for the birds -- homemade seed cakes
Write a review
Print
Ingredients
  1. 3/4 c all-purpose flour
  2. 1/2 c water
  3. 1 envelope unflavored Knox gelatin
  4. 4 c birdseed
  5. nonstick cooking spray
  6. cookie cutters
  7. wax paper
  8. drinking straws
  9. ribbon or string
Instructions
  1. Combine the flour, water and gelatin in a large mixing bowl until well combined.
  2. Add the birdseed to the mixture and stir until well coated.
  3. Coat the inside of large cookie cutters with the nonstick cooking spray and place the cutters on a sheet of waxed paper.
  4. Completely fill each of the cutters with the seed mixture, making sure to press it into all the little nooks and crannies.
  5. Cut a piece of straw for each cookie cutter and carefully insert it into each shape (not too close to the edge) and leave it in place. This will make a hole from which to hang the seed cake.
  6. Let the filled cutters set for two hours,
  7. Carefully push the dried seed mixture out of the cutters and onto the wax paper, and remove the straw pieces.
  8. Allow the shapes to dry overnight.
  9. Insert a piece of ribbon or string through the holes in your seed cakes, tie them off and hang them from the nearest tree.
Notes
  1. This is a great kid-friendly project and also makes wonderful gifts.
https://www.smalltalkmama.com/
Banana Nut Bread Begging to be Baked

Banana Nut Bread Begging to be Baked


BNbread

mushingWhen you and your preschooler are cooped up on a cold winter’s day with really ripe bananas and leftover Christmas pecans (yep you guessed it), it’s as if banana nut bread is just begging to be baked. If your little ones are anything like my son, they probably love to be in the kitchen. After all, it is one of the few places where mess making is expected, especially when you let them do the ceremonially mushing of the bananas (we used a fork and a cutting board for that one, and it brought big smiles).

So if you find yourself in our shoes on a cold winter’s day (of which we still have plenty), try your hand at our banana nut bread — it’s tasty, fun and makes your whole house smell great.

Banana Nut Bread
Serves 16
Basic banana nut bread
Write a review
Print
Cook Time
50 min
Cook Time
50 min
Ingredients
  1. 1 1/2 c all-purpose flour
  2. 1 1/2 tsp baking powder
  3. 1/4 tsp baking soda
  4. 1/4 tsp ground cinnamon
  5. 1/8 tsp salt
  6. 1 egg
  7. 1 c mashed ripe bananas
  8. 3/4 c sugar
  9. 1/4 c cooking oil
  10. 3/4 c chopped pecans
Instructions
  1. Preheat the oven to 350 degrees.
  2. Grease and flour the bottom of a loaf pan and set aside.
  3. In a mixing bowl, combine the flour, baking powder, baking soda, cinnamon and salt. Make a well in the center of the dry mixture and set aside.
  4. In another bowl, combine the egg, mashed bananas, sugar and cooking oil.
  5. Add this egg mixture to the dry mixture and stir until moist (the batter will be lumpy).
  6. Fold in the nuts.
  7. Pour the batter into the prepared loaf pan.
  8. Bake 50 - 55 minutes.
  9. Cool in pan for 10 minutes and then remove to finish cooling.
  10. Wrap and store to keep moist.
Notes
  1. Children will love mashing the bananas for this recipe. Try giving them a cutting board and fork to do so; but, as always, adult supervision is advised.
Adapted from Better Homes and Gardens New Cook Book
https://www.smalltalkmama.com/
Page 9 of 12
1 7 8 9 10 11 12