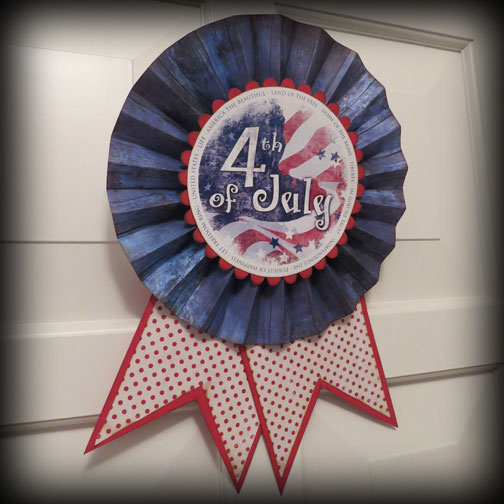
Today I’m showing you the newest addition to my patriotic home decor, complete with easy instructions and printable. This door-sized rosette was easy to make and you should be able to whip up your own in about half an hour or so — just in time for Independence Day.
Materials:
- Three pieces of red cardstock – 8 1/2 x 11″
- Two pieces of decorative blue paper – 12 x 12″
- One piece of coordinating decorative paper – 12 x 12″
- Paper adhesive
- Small piece of twine (for hanging)
- Craft Glue
- July4Rosette printable (pdf)
- Dark brown ink pad
Instructions:
- First, let’s make the large blue rosette portion of the project by cutting the two pieces of blue paper in half so that we end up with four pieces of 12 x 6″ strips.
- Ink the outside edge of each piece with the dark brown ink pad. Score each of these pieces at every inch and according fold.
- Using adhesive, connect all these pieces together. Keeping the paper flat, fan out the pieces in a circle and adhere the two ends together to create the rosette. To keep this crazy thing flat while you work, you can place a light-weight book or magazine on top of the newly formed rosette.
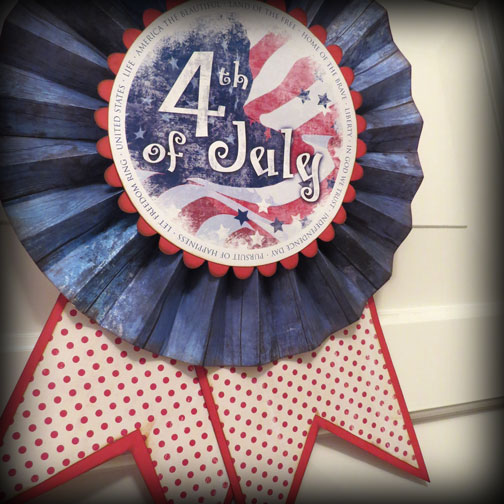
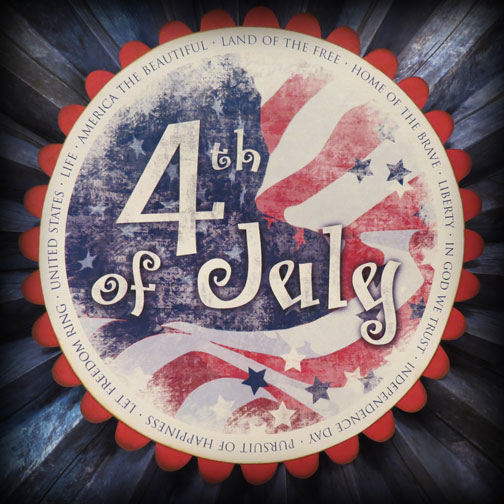
- Next, we’ll make the center of the rosette by cutting one piece of red cardstock into a circle approximately 8″ in diameter. I used my Cricut to cut the scalloped edge, but you can use whatever you have — cutting machine, decorative scissors or circle cutter.
- Ink the edges of the circle and glue to the center of the rosette using paper adhesive or glue.
- Print out the July4Rosette rosette center and cut into a circle, about an eight of an inch away from the outside words. Ink the edge all the way around and adhere to the red circle.
- To create the tails to the rosette, cut the two remaining sheets of read cardstock down to 6 x 11″ and then cut a triangle out of each piece to form the banner shape. Ink the edges.
- Cut the coordinating sheet of decorative paper to create two pieces that are a half inch smaller than the cardstock tails and cut a coordinating triangle in each piece. Ink all the edges and adhere to the cardstock tails.
- Adhere the completed tails to the back of the rosette at whatever angle you like.
- After everything is assembled, cut a short piece of twine and tie a loop for hanging. Flip over the rosette, add a dab of glue and adhere the twine loop.
- When the glue dries, hang your welcoming rosette for all your guests to see.
One thought on “Welcoming Rosette for Independence Day”