Our Vacation Bible School theme this year is “Escape to Athens with Paul,” so all the children and adults have been donning togas and laurel wreaths for the week — nothing like getting into character. While a friend made the “fancy” wreaths for all the workers, it was just too expensive of a project for all the kids to create. So in the interest of sticking to a budget (it’s VBS after all), I came up with a couple of inexpensive wreath alternatives, one for the older children and another for the youngsters. I think the kids enjoyed making their own wreaths, but with the everyday use I have noticed a few stray leaves here and there.
We’ll start with the easiest and least expensive wreath and work our way up from there.
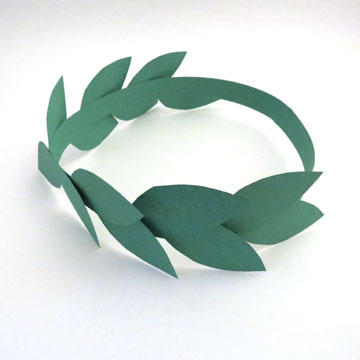 Wreath #1:
- construction paper
- glue sticks
- wrapping tape
Cut strips of construction paper 3/4 inch thick for the headband portion. Measure the circumference of each child’s head and trim accordingly, but don’t tape closed at this point. Cut out 14 leaves for the each wreath (I used a very simple leaf shape that I drew, because we literally cut out hundreds of these things). Using the glue stick, add the leaves to the band starting at the back and working forward. This works best if each new leaf is glued under the previous leaf, but our kiddos stuck them on every which way and they turned out really cute. Once all the leaves are glued on, use the wrapping tape to close the wreath loop and that’s it. Our four- and five-year-old kids made this type of laurel wreath, and even our older nursery children managed these with a little assistance.
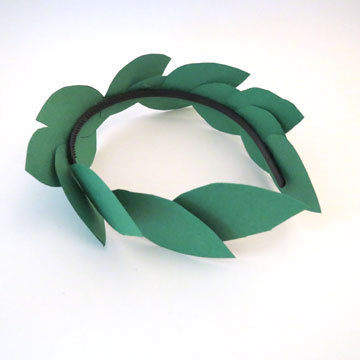 Wreath #2:
- plastic headbands
- construction paper
- glue dots
I love the way these laurel wreaths turned out, and they look adorable placed backward on the head so that the leaves wrap toward the face — very authentic. Again, we used 14 leaves for each wreath and used gluedots to adhere them. For the best effect, start at the back and work toward the front, placing each new leaf under the previous one (or however your kids decide to do it). The first through sixth graders made this type of wreath, but the younger kids had a bit of trouble with the glue dots. By the way, I found cheap four-packs of headbands at the dollar store.
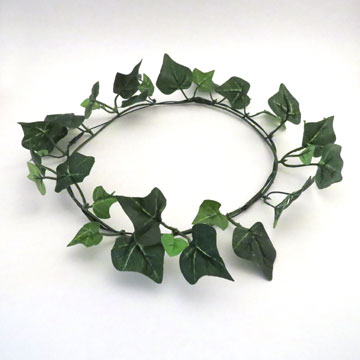 Wreath #3:
- medium gauge floral wire
- silk ivy vines
- green floral tape
We (okay, not me — thanks Morgan) made these wreaths for all the VBS workers to wear during our week in Athens. This project was not extremely expensive but I felt it was too much for our craft budget, thus the alternative wreaths #1 and #2 shown above.
Use your head as a general pattern to cut the lengths of floral wire and ivy vines. The finished product will just set on top of your head so the size doesn’t have to be exact. Twist the ends of the wire together to make a circle and wrap the ends with floral tape. Then wrap the wire loop with your ivy vine and adhere by wrapping both the wire and ivy vine together with the floral tape. That’s it — it’s super easy but can be a bit time consuming if you need to make several.
I hope you’ve found at least one of these ways to be suitable for making your own laurel wreaths, and good luck ”being Greek.”