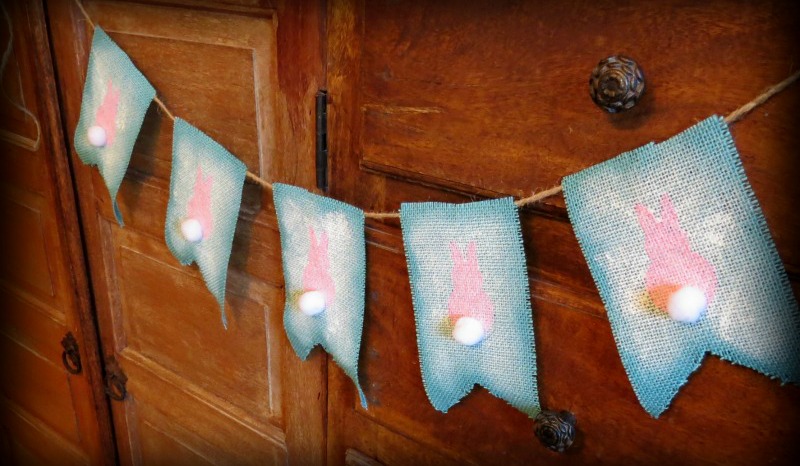
Yes, Easter is just a few days away, but you still have plenty of time to whip up this cute little bunny banner just in time for the holiday. . . especially if you use an inexpensive roll of burlap as your base. Below you can see the basic supplies I used and some are optional, but the best way I’ve found to create a quick banner is to stay clear of large expanses of material and focus on burlap that is more user friendly.
 Materials:
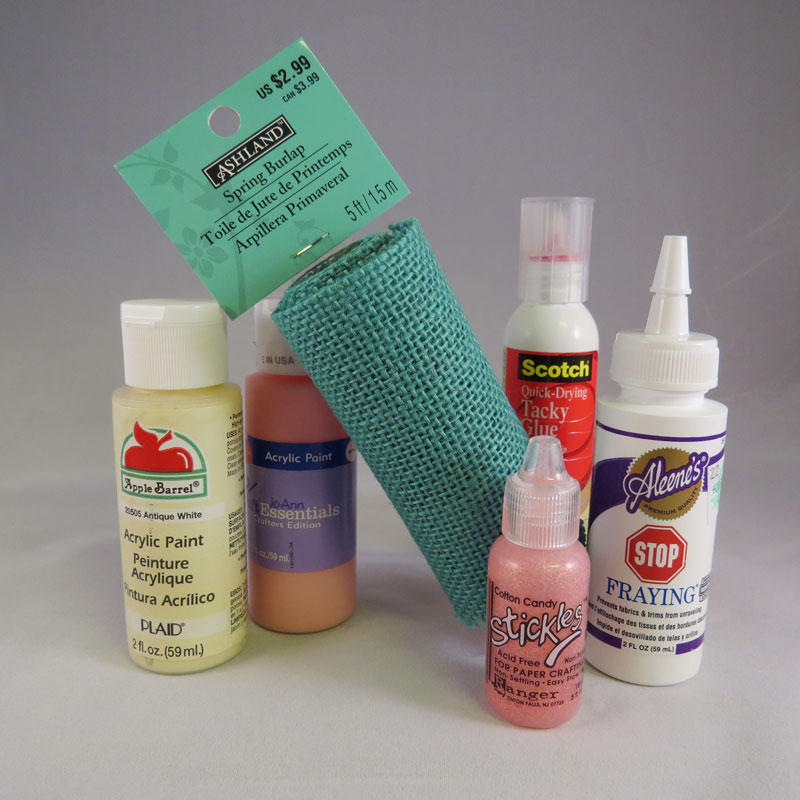
- Roll of unwired, unfinished burlap
- Liquid Fray Stop
- Off-white/white acrylic paint
- Pink acrylic paint
- Bunny template (pdf file)
- Pink Stickles (optional)
- Medium white pompons
- Twine or jute
- Fast drying craft glue
- Scissors
- Foam brush
- Small bristle paint brush
Directions:
- Cut five strips of burlap from your roll. My roll was four inches wide, so I made each strip eight inches long (Making your length twice as wide as the width is a good rule of thumb).
- Cut a triangle out of the bottom of each of the strips to form the banner shape.
- On the back of each burlap strip, run a bead of Fray Stop around all the edges. Don’ put it right at the edge, because you want just a wee bit of fraying to occur.
- After the Fray Stop has dried, turn your burlap pieces back over and use your foam brush to apply a light coat of white paint to the front of each piece — do not go all the way to the edges.
- Print off a copy of the bunny template (pdf file) on a piece of card stock paper, if you have it. Cut out the template to create a bunny shape in the middle of your sheet of paper.
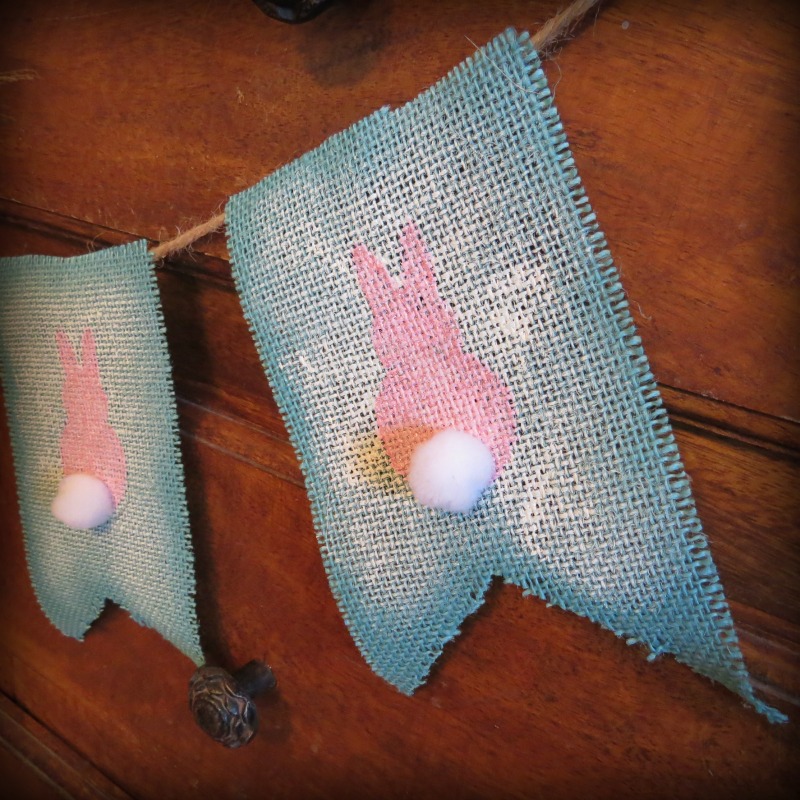
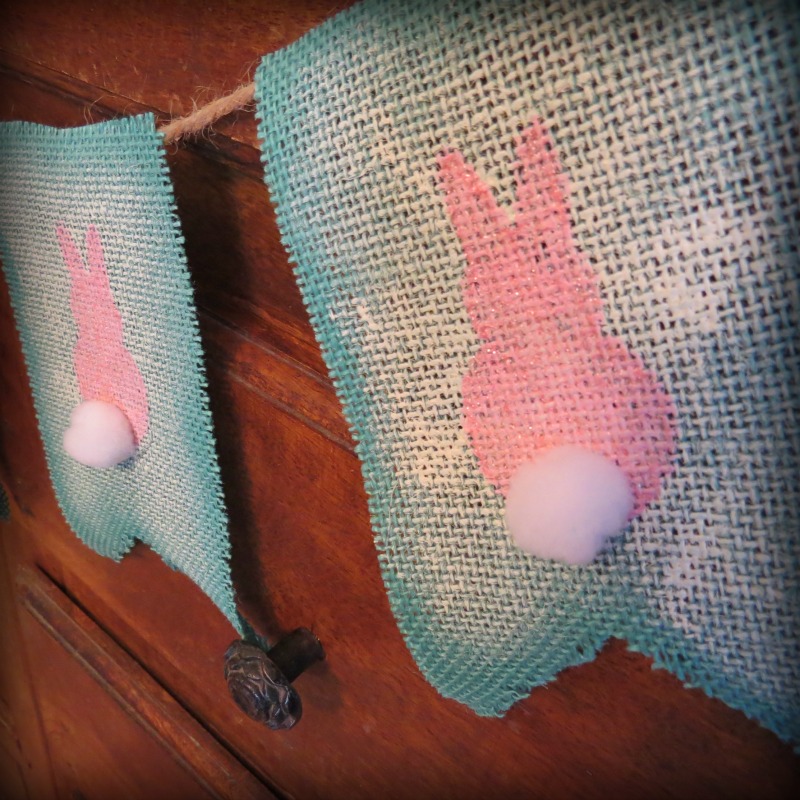
- After your white paint has dried, center your template on a burlap piece and using your foam brush dab the pink paint on to create the bunny shape. (Use light coats of paint and add as necessary, but make sure to use a pouncing motion instead of a brushing motion.) Repeat this step for each of the banner pieces.
- After the pink paint dries, this next step is optional but I found that it really helped draw attention to the little rabbits. I used pink Stickles and a small bristle brush to cover the pink area with a bit of sparkle. I chose Stickles instead of glitter just for the ease of use. Glitter tends to stick to burlap in all the wrong places.
- After everything is dry, use the quick-drying craft glue to adhere your white pompon bunny tails.
- When the tails are dry (yes, there are a lot of “watch it dry” moments in this project), slightly fray the edges of each of your banners.
- Lay out your banner pieces with desired spacing and cut a length of twine/jute to span the distance, adding a foot or so at each end for hanging.
- Flip over each banner, run a bead of quick-drying craft glue along the top back edge of each banner and lay your twine or jute in the glue to dry. And yes, that’s the last time you have to watch it dry, because you’re officially finished. Just hang and enjoy!
Shared at:
What’s It Wednesday @ Ivy and Elephants
WWAW @ Green Willow Pond
Pin It Monday @ Pursuit of Functional Home
Wow Us Wednesday @ Savvy Southern Style
That DIY Party @ DIY Showoff
Adorable!
Thanks, Diana. It was super easy to make also. Thanks for stopping by.
I love a craft that looks like something I could do. I am not so crafty but this is a great step by step and I could do it. My daughter could even help. Thanks for sharing at #HomeMattersParty
Angela, I’m so glad you like the banner, and it truly is very simple — just a bit of cutting, painting and gluing. I hope you and your daughter will give it a try!
Cute, cute, cute!