Ahhh, DIY projects. I enjoy them. . . right up until the time I have to call a professional. At that point I guess they cease being do-it-yourself tasks and become more like I’ve-finally-given-up-and-have-no-other-option projects. Let’s see, I’m going to call these my GUAC (give up and call) projects for short. GUAC, kind of like quack as in duck, like I’m sitting here dead in the water until a plumber arrives. . . but I digress.
Now I have this theory that most folks have a few GUAC projects in their past (and most surely in their future), but these are the things we don’t normally brag about. Most HGTV shows don’t show you the moments when normal folks like me slam down the screwdriver, scream, and throw themselves on the floor whimpering like a lost puppy. Most bloggers don’t detail their futile plights into blown backsplashes and impossible plumbing; and the Internet is filled with all kinds of helpful advice, just as long as it’s not the one scenario I’m currently facing. With all that being said, I decided to let you in on my latest DIY project turned GUAC task and exactly how my kitchen fought back.
We have lived in our current home for over four years now (which is a record for me), and since the day we made an offer on this abode I knew I wanted to change the backsplash in our kitchen. The glass tile is brown, which isn’t necessarily a bad thing; but when added to the brown cabinets, busy brown and black countertops and factor in the poor installation job, the kitchen just isn’t a place where I want to spend a lot of time (dear husband, insert cooking joke here).
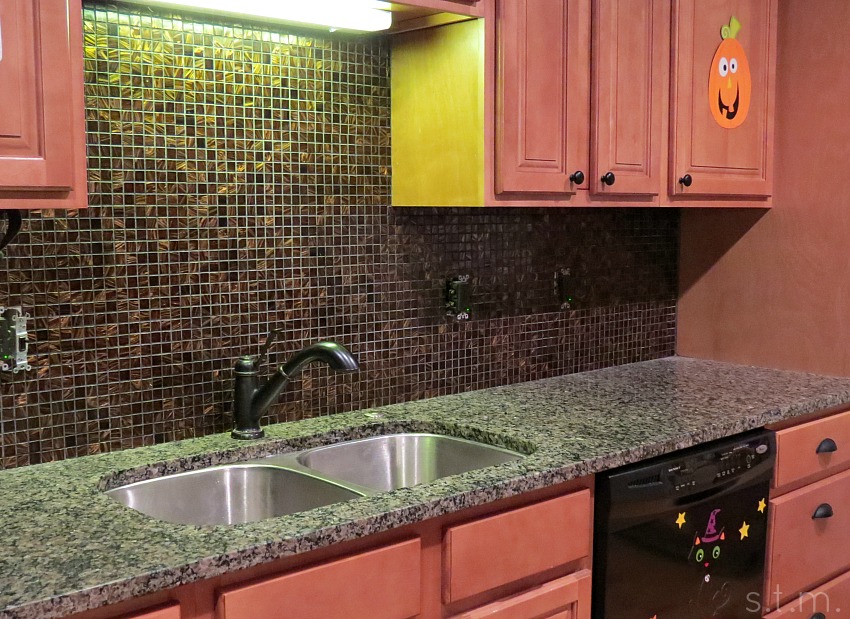
So here is how the kitchen looked for over four years. Other than knobs and pulls, the backsplash is our first real project in this room. I decided to give into my love of shiplap (thank you Joanna Gaines) because I thought it was something we could easily install over the existing tile, which would significantly cut down on time, cost and hassle. So the hassle (nor the time and costs) part didn’t exactly work the way I expected, but a bit of that comes with most things DIY.
To keep costs down, I decided to go with 1×8 pine boards instead of true shiplap. I needed something rigid enough to cover the tile without warping and I had the depth on my countertop to go with this option. I also have the protection of the existing tile backsplash, so moisture shouldn’t be a real problem. After I painted the boards a creamy white, this project was ready to roll. Of course there were a few incidentals that needed to be addressed before the real work began. . . and isn’t it in the details where the devil resides?
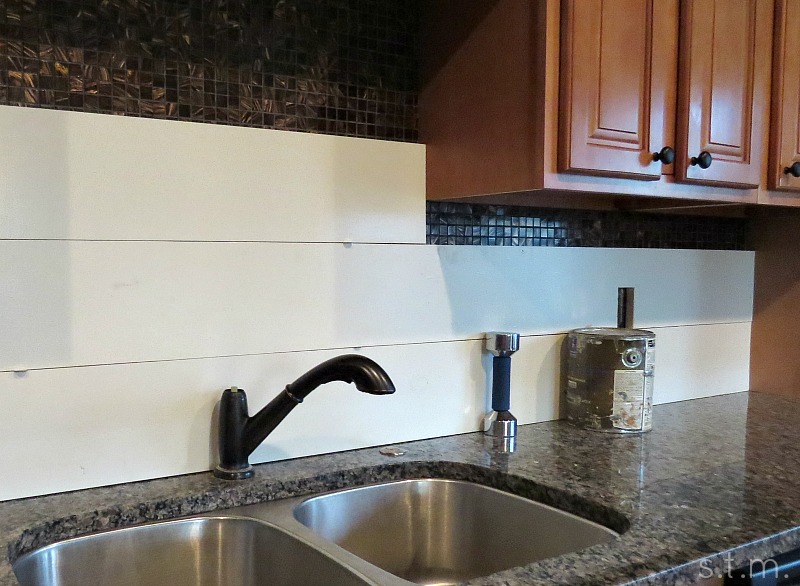
I bought a new kitchen faucet to replace the old awkward one, so it made sense to begin by getting that out of our way. Apparently the old faucet was not ready to go willingly, because we could not budge the nut that held it on under the sink. We decided to proceed without the faucet in place until we could purchase a better tool for the job. So on we went. . .
We adhered row one of the backsplash with Liquid Nails, because the brad nails wouldn’t punch through the tile behind it. No biggie, we figured it out. When it came to row two, we had to measure and cut holes in the board to accommodate the electrical outlets. No biggie there either, except that in my infinite wisdom I decided to do away with one of the outlets for a cleaner look. We got so excited to put up the second piece of wood that we forgot to properly connect the wires we wouldn’t be seeing. “Ruh Roh Raggy”. . . it wasn’t until about 4:00 am the next day that I suddenly realized our mistake.
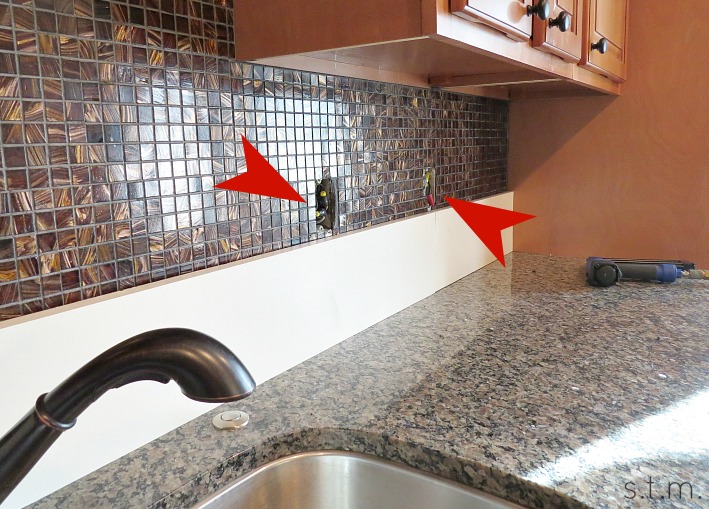
Luckily I snapped pictures along the way so I was able to blow up a pic, count the number of tiles between the two outlets, measure that distance, mark a spot and cross my fingers as my husband carefully drilled into my nice new backsplash looking for a junction box that we had lost (all with the electricity turned off of course). Luckily, my calculations were right on, but cutting a large hole in my new backsplash around electrical wiring was not my idea of a good time.
Since the hole was now there, we had to rewire that outlet but I didn’t have a diagram for the six incoming wires like I did for the other outlets, because I didn’t think I would need one. This was my first foray into GFCI wiring and I was stumped. When I asked a fella at Home Depot, he told me to call an electrician. What? It was working when I took it apart, it should work again and there was no way I was going to pay an electrician to walk into my house, connect a few wires and bill me for 100 bucks. So after many failed attempts. . . I called an electrician. Okay, so he is a really nice guy we know who has done some work for us; and although I did call him, he just talked me through the problem and reassured me that as long as the power was shut off I wouldn’t blow up the house or fry my brain. Score!
So now the backsplash was up and the electrical was working, but try as we might, that faucet was just not budging. Grrr! Finally my husband and I lowered our heads and started calling plumbers. I located a really nice company that also tried to talk me through some ideas, but with no new suggestions we scheduled a visit for that afternoon. When two strong men arrived and pushed, pulled, hit, and pleaded with the nut under the sink (insert pun here), I quickly became relieved that I had called them. With a load of effort, the nut finally moved, and while they were there I had them install the new faucet in record time. All that and the bill was less than they quoted! Winner, winner! (If you live in the KC Northland and need someone to wrestle your plumbing, call Full Nelson Plumbing. Catchy name, eh?)
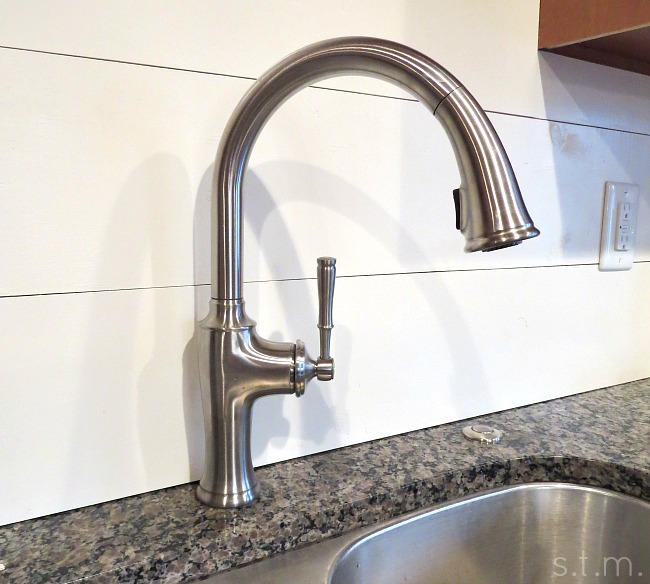
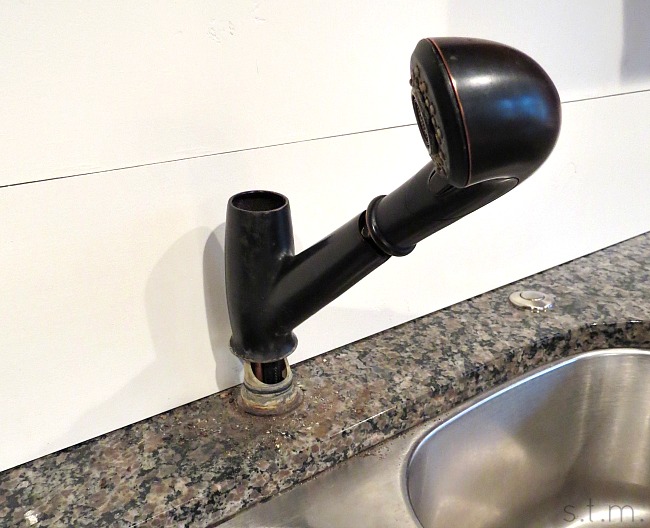
Here is my new faucet after the extra expense. It looks so pretty that I almost didn’t mind the extra $121 it cost to make it happen. As for my husband, he thinks it was definitely money well spent.
So several days and several dollars after our kitchen remodel reared its ugly head, we finally completed stage one of our DIY GUAC project. But just when I thought it was safe to go back into the kitchen, you won’t believe what happened next. . .