Tag: recipe

Super Yummy Quick and Easy Chili

Super Yummy Quick and Easy Chili

chili
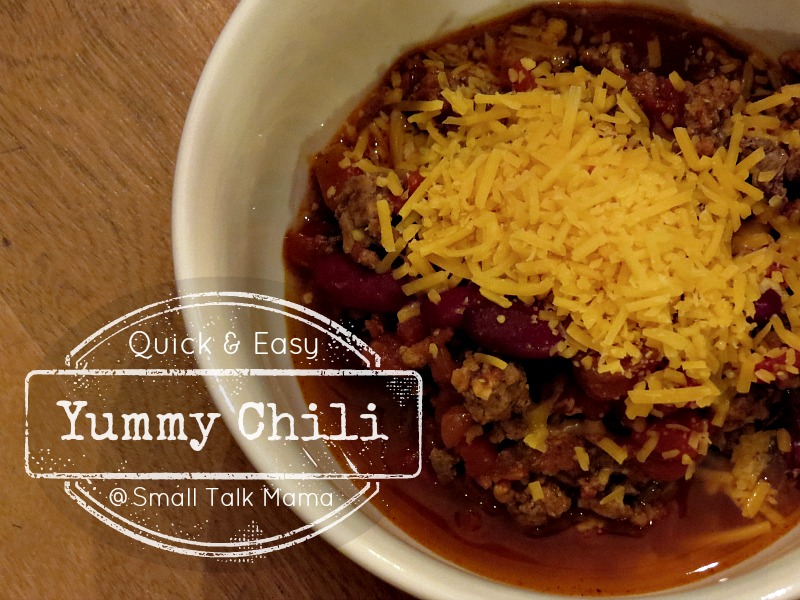
We haven’t seen the sun much during the last week and cooler temps have finally come along, so in my kitchen that means chili is on the menu. I love to make a large batch of chili that will feed the family several times over because it’s easy, makes great leftovers and is super yummy. . . especially when you add a few Fritos at the bottom and grated cheese on the top.

Now when I make my chili there are a few things you must know. First, I don’t use a recipe and it never tastes quite the same way twice. I throw in a bit of this and a dash of that and measuring spoons are usually not part of the process. Second, if my husband was lucky (or eh, “skilled”) enough to have put a deer in the freezer that particular year, I usually make chili with ground venison. It’s a great lean, natural and healthy alternative to beef and it makes fabulous chili. Lastly, we like a bit of kick with our chili, but having a five-year-old in the house mandates a more mild recipe and I’m okay with that. You can always add some chopped jalapenos or more Tabasco to your recipe if you need more spice.

So if you’re not completely afraid of trying this recipe now that I’ve divulged all my little chili-cooking quirks, here goes the basic, delicious way to make chili every time. Although I don’t normally measure out quantities, I did make a tasty batch using the following recipe just so I could share it with my readers. . . and maybe my son and his family one day.

Chili
Serves 6
Quick and easy go-to recipe for super yummy chili every time.
Write a review
Print
Prep Time
30 min
Cook Time
2 hr
Total Time
2 hr 30 min
Prep Time
30 min
Cook Time
2 hr
Total Time
2 hr 30 min
Ingredients
  1. 1 lb browned ground beef (or venison)
  2. 1/4 cup chopped onion
  3. 1/4 tsp garlic salt
  4. 1/8 tsp ground black pepper
  5. 1 tbsp chili powder
  6. 1 can (16 oz) dark red kidney beans - drained and rinsed
  7. 1 can (8 oz) tomato sauce
  8. 1 can (14.5 oz) petite diced tomatoes
  9. 1 can Ro-Tel Chili Fixins
  10. 1 dash of Tabasco sauce
Instructions
  1. Add all the ingredients to a large pot and if the chili is not "soupy" enough, add a bit of water.
  2. Bring chili to a boil, stirring periodically.
  3. Reduce heat and let simmer for 1 - 2 hours with lid on pot.
  4. Serve hot.
Notes
  1. You can add some chopped jalapenos or more Tabasco to give your chili some kick.
https://www.smalltalkmama.com/
Awesome Gluten-Free Peanut Butter Cookies

Awesome Gluten-Free Peanut Butter Cookies

Today’s recipe is for all those folks adhering to a gluten-free diet these days; but I promise all of you who aren’t, will enjoy these cookies just as much as the ones your mama used to make. Yup, I know that’s saying a lot, but I couldn’t believe my tastebuds when I took a bite out of these yummy gluten-free peanut butter cookies.

gluten-free peanut butter cookies

So this one is for my good friend, M., because she never makes a fuss of her gluten-free diet and she thought these cookies were pretty delicious (or at least that’s what she said).

Gluten-Free Peanut Butter Cookies
Yields 36
A delicious gluten-free alternative for peanut butter cookie lovers.
Write a review
Print
Prep Time
30 min
Cook Time
10 min
Total Time
1 hr 15 min
Prep Time
30 min
Cook Time
10 min
Total Time
1 hr 15 min
Ingredients
  1. 2 cups creamy peanut butter
  2. 1 1/2 cups granulated sugar
  3. 1/2 cup packed brown sugar
  4. 2 large eggs
  5. 2 tsp baking soda
  6. 2 tsp vanilla extract
  7. 1/4 tsp salt
Instructions
  1. Heat oven to 350 F.
  2. Mix the peanut butter and sugars on med-high for 2 to 3 minutes.
  3. Reduce speed and mix in the eggs, baking soda, vanilla and salt.
  4. Roll or scoop spoonfuls of dough into balls and place on a parchment-lined baking sheet.
  5. Using a fork, press the dough to about a half-inch thickness making a crisscross pattern on top of each cookie.
  6. Bake cookies for 5 to 6 minutes, rotate the baking sheet and finish cooking for 5 to 6 minutes.
  7. Let cookies cool completely and enjoy!
Notes
  1. You may never make classic peanut butter cookies again after you taste this yummy gluten-free option.
Adapted from Real Simple
https://www.smalltalkmama.com/
Jell-O Playdough, Recipe for Homemade Fun

Jell-O Playdough, Recipe for Homemade Fun


playdough1

We finally tried the Jell-O playing dough thing this weekend, and mom and son gave it two thumbs up. . . oh, and also dad, because he actually gave it the taste test since it smelled so good (not like he snacked on it, just a nibble). We used the recipe from Modern Parents, Messy Kids, but I have seen similar recipes all over the web.

We made raspberry dough because I had it on hand, which made the pinkish red colored dough that you see here. My son enjoyed mixing all the ingredients together, but quickly tired of the stirring and kneading steps; although he magically reappeared for the play/testing phase. The cooking process didn’t take that long, just remember to keep stirring until you really can’t stir any longer. Also, I probably kneaded an additional cup of flour into the dough to get rid of the stickies, so just keep “kneading it in as needed” (ha, get it). When it was finished, I admit I was completely surprised by how much it actually felt like the real thing, and this recipe makes enough for at least a couple of kids to enjoy.

playdough2

Our son played with his newest creation for over an hour Saturday afternoon, and afterwards, we plopped it into an airtight container and put it in the refrigerator until the next play day. According to Modern Parents, Messy Kids, the playing dough should last at least a few weeks if properly stored in the fridge.

So if you have a hankering for some homemade fun, here’s the recipe you should use:

Jell-O Playdough
Homemade playdough that feels like the real thing.
Write a review
Print
Prep Time
10 min
Cook Time
20 min
Total Time
40 min
Prep Time
10 min
Cook Time
20 min
Total Time
40 min
Ingredients
  1. 1 c white flour
  2. 1 c warm water
  3. 2 tbsp. salt
  4. 2 tbsp. cream of tartar
  5. 2 tbsp. cooking oil
  6. 1 Jello pack (3 oz.)
  7. extra flour for kneading
Instructions
  1. Mix all of the ingredients (except extra kneading flour) together in a small saucepan until the lumps are gone.
  2. Cook over medium heat, stirring continuously until it thickens into a big ball of dough. (Stir until you can't stir anymore.)
  3. Turn out the dough on a flour covered surface, cutting board or mat.
  4. Let the dough cool.
  5. Add flour and knead the dough until it is no longer sticky (1/2 cup to 1 cup of flour).
Notes
  1. The dough should stay good for a few weeks if placed in an airtight container and kept in the refrigerator.
Adapted from Modern Parents, Messy Kids
https://www.smalltalkmama.com/
 Shared at:
Green Willow Pond


Page 4 of 6
1 2 3 4 5 6