Tag: In the Kitchen

Banana Nut Bread Begging to be Baked

Banana Nut Bread Begging to be Baked


BNbread

mushing
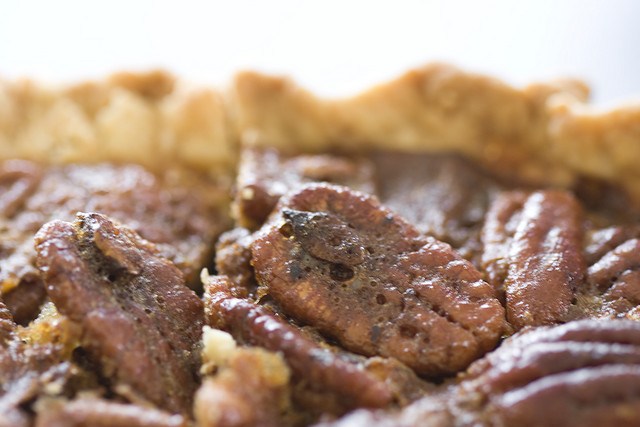
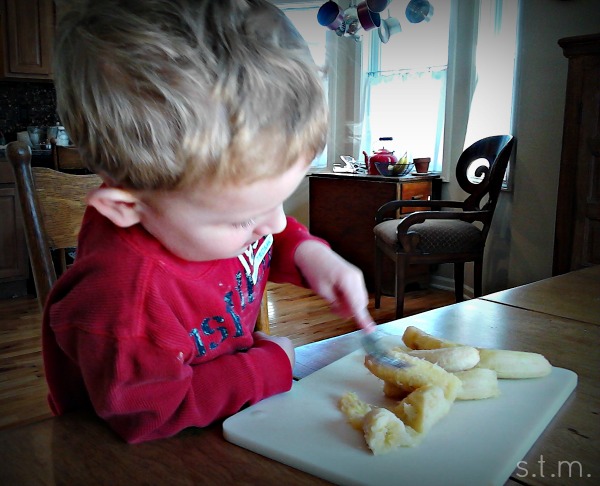
When you and your preschooler are cooped up on a cold winter’s day with really ripe bananas and leftover Christmas pecans (yep you guessed it), it’s as if banana nut bread is just begging to be baked. If your little ones are anything like my son, they probably love to be in the kitchen. After all, it is one of the few places where mess making is expected, especially when you let them do the ceremonially mushing of the bananas (we used a fork and a cutting board for that one, and it brought big smiles).

So if you find yourself in our shoes on a cold winter’s day (of which we still have plenty), try your hand at our banana nut bread — it’s tasty, fun and makes your whole house smell great.
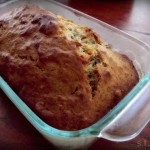
Banana Nut Bread
Serves 16
Basic banana nut bread
Write a review
Print
Cook Time
50 min
Cook Time
50 min
Ingredients
  1. 1 1/2 c all-purpose flour
  2. 1 1/2 tsp baking powder
  3. 1/4 tsp baking soda
  4. 1/4 tsp ground cinnamon
  5. 1/8 tsp salt
  6. 1 egg
  7. 1 c mashed ripe bananas
  8. 3/4 c sugar
  9. 1/4 c cooking oil
  10. 3/4 c chopped pecans
Instructions
  1. Preheat the oven to 350 degrees.
  2. Grease and flour the bottom of a loaf pan and set aside.
  3. In a mixing bowl, combine the flour, baking powder, baking soda, cinnamon and salt. Make a well in the center of the dry mixture and set aside.
  4. In another bowl, combine the egg, mashed bananas, sugar and cooking oil.
  5. Add this egg mixture to the dry mixture and stir until moist (the batter will be lumpy).
  6. Fold in the nuts.
  7. Pour the batter into the prepared loaf pan.
  8. Bake 50 - 55 minutes.
  9. Cool in pan for 10 minutes and then remove to finish cooling.
  10. Wrap and store to keep moist.
Notes
  1. Children will love mashing the bananas for this recipe. Try giving them a cutting board and fork to do so; but, as always, adult supervision is advised.
Adapted from Better Homes and Gardens New Cook Book
https://www.smalltalkmama.com/
Let’s Talk Pecan Pie

Let’s Talk Pecan Pie


pecanpie

So let’s talk pecan pie. It’s a classic dessert that can be a little daunting if you’re not familiar with baking this delicious Southern favorite. Well, for that matter it might be a favorite of folks up north or even out west, but I’ve never eaten pecan pie in those places so I wouldn’t know.

I used to think that Nannnie (my wonderful deceased grandmother) made the absolute best pecan pie ever and so one day long ago I asked her for the recipe. To which she responded in her cute little Southern accent (not Paula Deen thick, but a hint of Sandra Bullock drawl), “Lands sakes, child. I use the Karo® Syrup recipe. It’s printed right on the bottle.” So that’s my response to the very same question and it’s what I’m telling you here today. Grab a bottle of Karo Syrup and follow the directions printed on the bottle and you’ll probably be feasting on the ooey, gooey sweetness that is pretty good pecan pie.

Now if “perfect” pecan pie is the very thing you seek, there are two additional things you need to know. One, start with a good homemade pie crust; and two, aluminum foil is your friend. Sounds simple, eh? Well you just happen to be in luck, because while I’m not stealing Karo’s thunder by publishing their pie recipe here at Small Talk Mama, I am posting the best pie crust recipe I know — and this one did come out of my Nannie’s recipe box.

But before I get to the recipe, let me tell you about the aluminum foil. Before I put my pecan pie in the oven, I create a dome of foil that covers the entire pie. I allow the pie to bake that way until the last 10-15 minutes of the required baking time, which prevents the crust and top of the pie from getting too brown before the syrupy insides have a chance to completely set up.  I then remove the foil and allow the pie to finish baking as usual. Sometimes I have to add a few minutes of baking time to get the top and crust sufficiently browned, but that just requires a bit of babysitting.

That’s it. Those are all my secrets to the perfect pecan pie, but all this advice does come with a warning. If you come from a pie eating crew, you just might become the designated pecan pie maker for family affairs and potluck gatherings, which isn’t all bad when the kudos come pouring your way.

photo credit: .imelda via photopin cc

Nannie's Pie Crust
Yields 5
Old-fashioned pie crust
Write a review
Print
Ingredients
  1. 5 cups flour
  2. 1 tsp salt
  3. 1 lb Crisco
  4. 1 egg
  5. 1 tbsp. vinegar
  6. water
Instructions
  1. Put flour, salt and Crisco in a mixing bowl.
  2. Combine egg and vinegar in a one-cup measuring cup and add enough water to fill the cup.
  3. Add this cup to the flour mixture in the bowl and blend everything together well.
  4. Divide into five equal parts and roll into large balls.
  5. If using immediately, place crust in the refrigerator for 15 minutes before rolling out. To save for later, wrap crusts individually and freeze until needed.
Notes
  1. This pie crust can be made ahead of time, frozen individually and thawed as needed.
  2. photo credit: .imelda via photopin cc
https://www.smalltalkmama.com/
Tastes Like (Hamburger Dill) Pickles!

Tastes Like (Hamburger Dill) Pickles!

pickles2

This one is for all you Wednesday night Bible study ladies, because my homemade hamburger dills actually taste like pickles and I promised to post the recipe here at Small Talk Mama. Yes, my husband and I actually got the first taste of our maiden pickling project and we both gave it a thumbs up. I don’t know why we’re always so surprised, when we try a new recipe or grow a new vegetable, to find that it tastes exactly as it should. I remember our first harvest of broccoli years ago — it actually tasted exactly like broccoli. Imagine that! That being said, we haven’t yet opened the dill spears, but I’ll keep you posted — the suspense is just killing you, I know.

So here’s the recipe we used for hamburger dills, which were a great addition to our grilled burgers. Unlike most recipes of its kind, this one does not require a several-day soaking before the canning process. So if you’re “in a pickle” and can’t wait days to can, you might want to try this quick and easy recipe.

Recipe adapted from Ball Blue Book Guide to Preserving

Hamburger Dill Pickles
Yields 7
Canning recipe for hamburger dill pickles that doesn't require a lengthy ice water bath.
Write a review
Print
Ingredients
  1. 4 lbs cucumbers
  2. 6 tbsp canning salt
  3. 4 1/2 c water
  4. 4 c vinegar
  5. 14 heads fresh dill
  6. 3 1/2 tsp mustard seed
  7. 14 peppercorns
Instructions
  1. Wash cucumbers and drain. Cut cucumbers into 1/4-inch crosswise slices, discarding blossom ends.
  2. Pack cucumbers into hot jars, leaving 1/4-inch headspace.
  3. Add 2 heads of dill, 1/2 tsp mustard seed and 2 peppercorns to each jar.
  4. Combine salt, water and vinegar in a large saucepot. Bring to a boil.
  5. Ladle hot liquid over cucumbers, leaving 1/4-inch headspace.
  6. Lightly tap jars to remove air bubbles, and screw on two-piece caps.
  7. Process 15 minutes in a boiling-water bath.
Notes
  1. This recipe makes delicious husband-pleasing hamburger dill pickles!
Adapted from Ball Blue Book Guide to Preserving
https://www.smalltalkmama.com/


Page 9 of 12
1 7 8 9 10 11 12