 The other day I was just plain grumpy. Everything I did and everyone who called just seemed to make me more so. That’s when I remembered I had Jo-Ann’s coupons and thought shopping at half price would surely cheer me. I dressed my toddler and plopped him in the car for a short two-block drive to the store (we were going to walk but it looked stormy and being caught out in the rain, or just plain exercise itself, would have surely made the grumpys just worse).
We spent almost an hour at Jo-Ann’s, which was enough time for me to work out my mood and let my son visit with at least every other shopper we encountered — he’s a rather social guy. I bought six yards of burlap and three packages of flour sack dish towels, all at half price. I love that Jo-Ann’s will now take multiple coupons. The burlap was for curtains in my basement and the flour sacks were for the kitchen – two areas that had been bare and neglected for far too long.
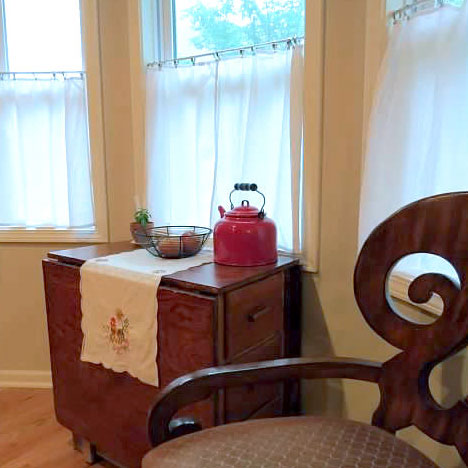
I simply hung the flour sacks on rings and rods to dress my naked kitchen windows. Let me tell you, it doesn’t get any easier than that. I eventually do want to add a pop of red somewhere near the bottom of each curtain, but I haven’t decide whether I should use ribbon, a fancy sewing machine stitch or some other technique. I’ll update you with the “exciting news” when I decide.
For the burlap curtains, I used almost three yards of fabric for each of the two windows. Since burlap wants to unravel so quickly I ironed on a strip of hem tape at the top of each curtain, folded that over once and ran a couple rows of stitches along that top hem. I left the sides raw, because they already had a stitch down each side. I clipped rings (donated from one of my nieces — thanks Emily) along the top hem and strung those onto purchased rods. After hanging the panels, I marked a bottom length and simply ironed on a strip of hem tape. I didn’t bother folding and stitching that cut, because I wanted it to look more natural like the side edges. I also found half-price iron pull-backs at Hobby Lobby to complete the look.
I don’t think I’ve ever dressed windows so cheaply and much more easily than with these two projects, all just spawned from a very grumpy day. No wonder I don’t get more done around the house — I guess life is just too good.

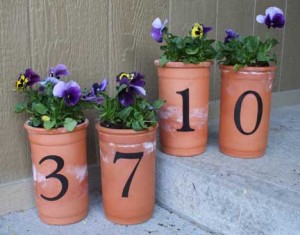
 Spring is near, and I’m dressing the house appropriately. One of my favorite new projects is the house number pots shown here. I have no idea where I found this idea last year but I love it, especially since we still do not have numbers on the outside of our home. . . yes, it has been nine months since we moved. My goodness, that’s long enough to birth a baby — I should probably get on this project (the numbers, not the birthing).