Tag: Halloween

Transformed Buckets are Halloween Hit

Transformed Buckets are Halloween Hit

Halloween buckets

ReviewDisclaimerNew

I hope everyone is in the Halloween “spirit” these days, but if you need a little extra inspiration these holidays buckets might just do the trick. I received a set of six medium galvanized pots from Oriental Trading and transformed them into black and orange Halloween buckets with a bit of spray paint, sticky vinyl, chalkboard coating and washi tape.

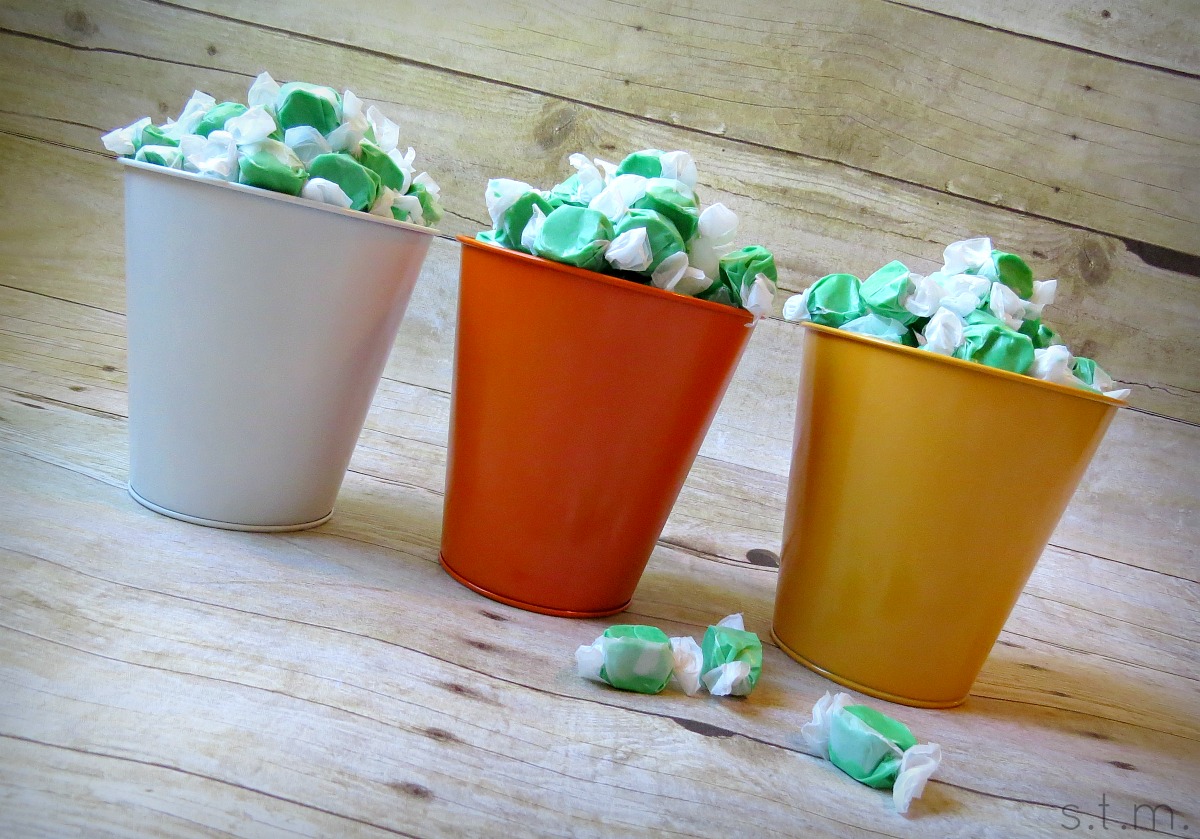
The first set of buckets was simple to make using candy corn as my inspiration. I simply spray painted one white, one orange and one yellow and plopped them down in a row. The hardest thing about this project was getting the weather to cooperate with my painting schedule. You can fill these pots with candy, chips or other goodies to transfer a party table into something festive.

buckets

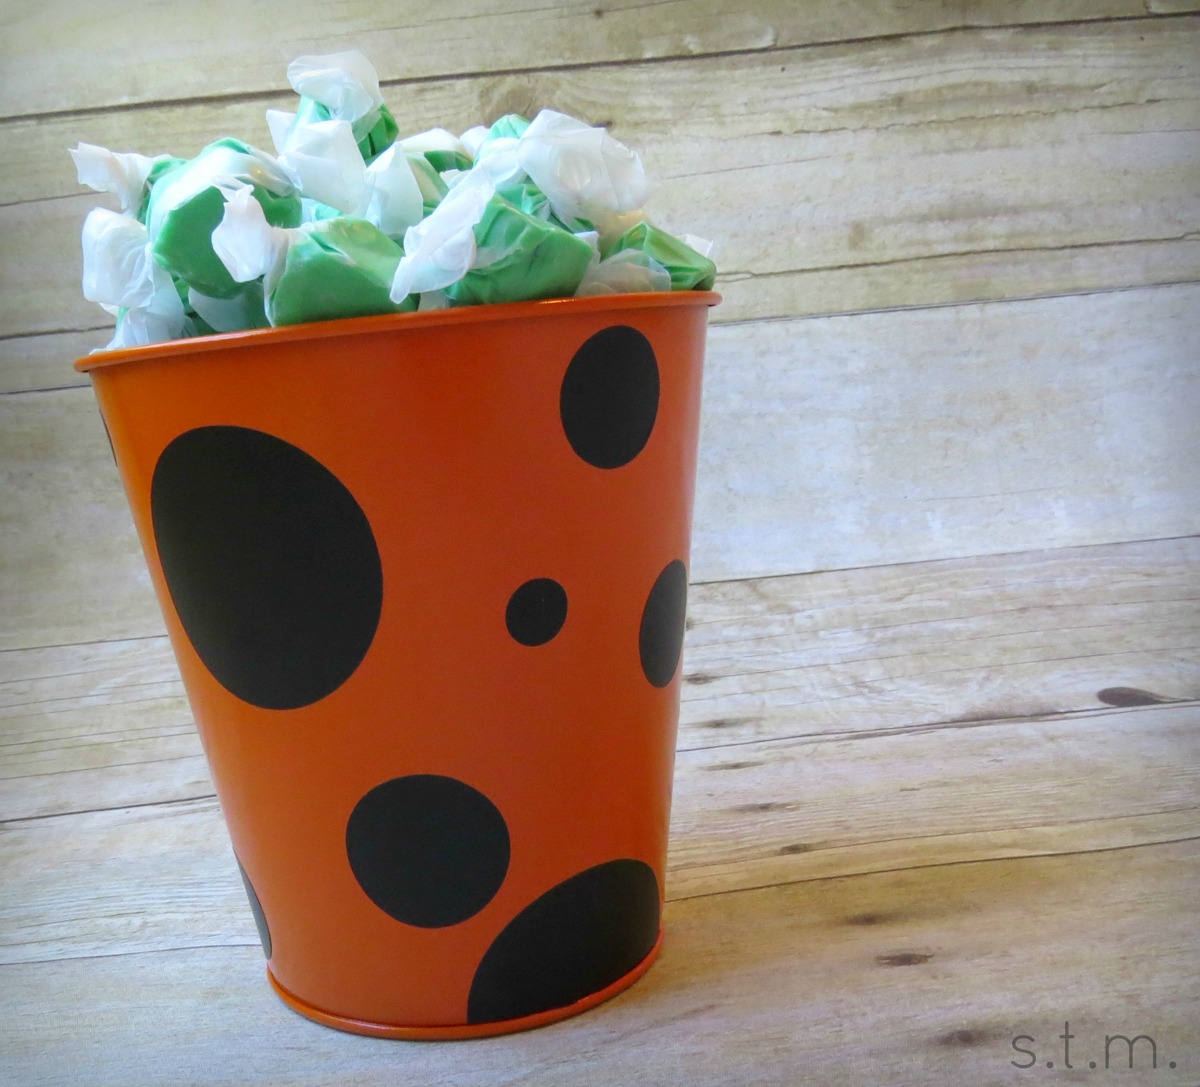
This next bucket was a combination of spray paint and vinyl. I simply sprayed the pot orange and after it dried I randomly adhered black vinyl polka dots for a fun and festive look. I cut the dots with my Circuit machine, but I’m sure you can find round stickers at various crafting stores around town.

buckets

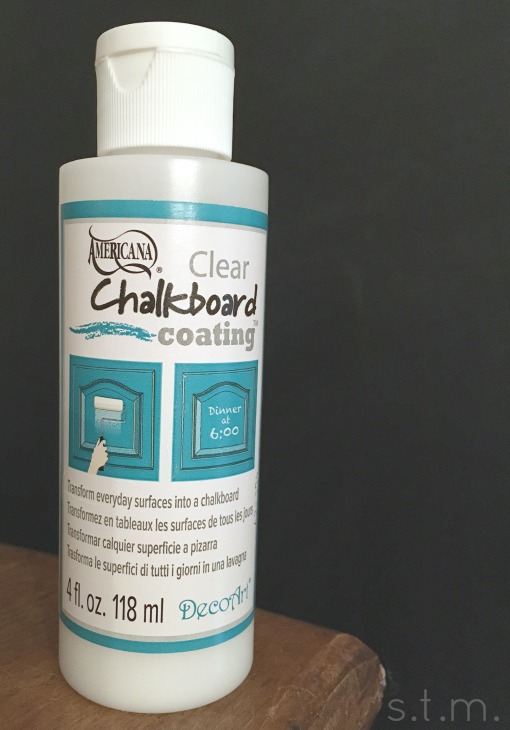
This chalkboard bucket is one of my favorites, because it can change with your mood or even the seasons. I sprayed the bucket with flat black paint and after it dried I applied two coats of the same chalkboard medium I used on my pumpkin countdown calendar. After everything cured overnight, I was able to write a message on the pot using chalk. I don’t know about you, but I think it’s “Boo-tiful.”

buckets

This last bucket has a different look than the others, but it was fun to use some of my Halloween washi tape that seems to go on and on forever. I started by spraying the pot white and after it dried I started applying tape. Since the bucket is wider at the top than the bottom, I had to be careful with my spacing and make sure the strips of tape stayed vertical. After a few strips, I quickly got the hang of it.

I just love my new festive buckets and think they will be a Halloween hit! If you are interested in making your own pots, visit Oriental Trading to place an order or visit their Halloween Headquarters and craft page for loads of other great inspiration.

Oriental Trading sent me some of these products used in this project for review,
but all opinions are my own.


Track the Days Until Trick-or-Treat

Track the Days Until Trick-or-Treat

Track the Days Until Trick-or-Treat

ReviewDisclaimerNew

Hello October! I’m so excited to welcome the month, which also means hello Halloween. I’ve slowly been sprucing up the homestead for fall, but today is officially decorating day for bats, spiders and all things spooky.

As we count down the days until Halloween, what better way to keep track than with a crafty chalkboard pumpkin. I used the last of three large wood centerpieces from Oriental Trading to create this cute countdown calendar and I used the same basic technique as I did for the teacher’s apple from August.

Track the Days Until Trick-or-Treat

Track the Days Until Trick-or-Treat

pumpcount5The main difference with this project (other than the obvious change of color) is the finishing technique. Instead of wax, I used a couple of coats of Americana’s Clear Chalkboard Coating over the entire pumpkin face. This product creates a flat chalkboard finish on just about any surface. I really like this stuff, because I can turn any color of paint I already have into a chalkboard without spending loads of money on limited choices of specialty paints. This pumpkin also differs from the apple with the addition of two pumpkin-shaped leaves and some wire spirals, which thread through a hole and create a hanger on the back.

tracking the days to trick-or-treat

This cute little pumpkin is a great way to track the days until trick-or-treat, and you can easily make your own in just a few hours. You can find some of the products used here and lots of additional Halloween ideas at Oriental Trading online.

Oriental Trading sent me some of these products used in this project for review,
but all opinions are my own.

Spooky Life Given to Christmas Countdown Calendar

Spooky Life Given to Christmas Countdown Calendar

count down

Halloween is definitely one of my favorite holidays of the year, running a close third behind Christmas and Easter. I love to decorate, get spooky and celebrate with tricks and treats! I know you’ll think I’m silly, but one of the best things about getting my Halloween on is that this spooky day comes at the very end of the month, which means I can start decorating on the first and enjoy the orange and black all month long. It has a definite beginning and an end, which suits my creative self just so.

Since Halloween is a month-long celebration, it stands to reason that one should count down the days until the climatic celebration, and what better way to do so than with a mini calendar. I mean, we do it for Christmas, so why not Halloween. . . and Christmas is exactly where I came up with the inspiration for these cute little countdown blocks.

count down

I purchased this Christmas countdown project at Hobby Lobby a few weeks ago and after I got it home I decided I needed to get another for a Halloween version of this project. The regular price for the kit was $5.99 but I purchased mine at 40 percent off, so it was seriously affordable.

count down

I discarded all the Christmas stuff in the kit, just keeping the blocks and number stickers for the Halloween version of this project. The numbers are glittery black, so they are perfect for this project. One thing I discovered about the number sheets is that each sheet belongs to one block. If you adhere all the numbers from one sheet to one block and all the numbers from the other sheet to the other block, you will be able to count down all the days without a hitch (the number six doubles as the number 9).

To begin this project, I spray painted my blocks black and then picked out some cute Halloween paper from my burgeoning stash. I measured my blocks, cut my paper accordingly, inked the edges in black, stuck the self-sticking numbers to the paper squares and then adhered those to all six sides of the small blocks.

For the bottom block I used the same method as the small blocks, but instead of numbers I printed out a “Days Until Halloween” saying and stuck it to the front of the block. I didn’t bother with the bottom and back of the larger block because no one will see it, but if you feel the need to finish it all off go for it. I completed this project with a couple of cute do-dads and now we are happily counting down the days until Halloween. The hardest part about this project was deciding where to display it. Go figure.


Page 1 of 4
1 2 3 4