A Little Outdoor Grunge for the Guys

A Little Outdoor Grunge for the Guys

OWH212
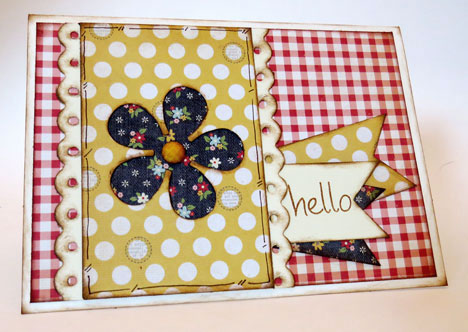
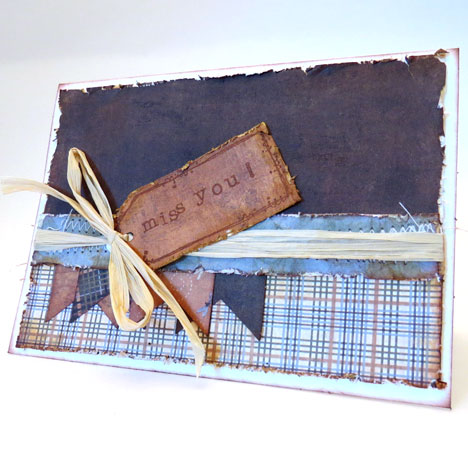
Operation Write Home is sporting a cute little sketch this week and I decided to go manly for my challenge card. I used papers from The Paper Loft’s Huckleberry Pond collection, because nothing says “I’m a guy” better than a little outdoor grunge. I stayed pretty true to the sketch but added a little “miss you” tag to the front along with my stitching and raffia. I also roughed up all the edges, added some ink stain and crumpled my horizontal strip within an inch of life to add a nice comfortable worn look. I hope you like!

Click on the image to enlarge.


A Window unto Summer

A Window unto Summer

OWHflowerwindowSimple Stories’ Summer Fresh 6×6 paper pack was the perfect pallet for Sunday’s Operation Write Home window sketch challenge. I mean, what says summer like red gingham and flowers? This little card makes me want to picnic (now if the foot of snow would go away, we might be talking).

The flower shape is punched into the top layer so that the blue layer peeks out from behind the window, and a yellow do-dad adds the finishing touch. As usual, I inked all the paper edges; plus I added some faux stitching to one layer for a bit more detail.

Click on image to enlarge.

MailItTeaser2

One Boy’s Valentine Banner

One Boy’s Valentine Banner

Valentine banner

Yesterday I told you that my three-year-old son and I spent part of our snow day creating a cute little Valentine project, so today I thought I would share our kid-friendly craft with all of you (especially if you’re still stuck inside from this week’s storm). I came up with this quick banner idea by combining a couple of Pinterest projects with some of my son’s favorite things — paint and glue.

To create your own Valentine banner you will need:

  • brown paper lunch bags
  • empty toilet paper/paper towel roll
  • red washable paint
  • scissors
  • glue
  • string

To begin the project, cut a paper bag right above the bottom fold. Then cute along the two outside edges to give you two rectangular banner pieces. If you want, you can cut a triangle out of each of those pieces or just leave them square on the bottom. Cut as many bags as you desire for your project. If your child is old enough to handle the scissors, great but make sure an adult supervises this task (I let my three year old, cut on some scrap pieces, but he wasn’t up for the first part of this project).

TPheartstamp2Next, shape the empty toilet paper roll into a heart. I started by creasing the top inward, being carefully not to make creases in the rounded parts of the heart, and then I creased the bottom point of the heart. After you have the shape to your liking, pour some washable paint on a paper plate. Have your child grasp the TP heart roll around the middle to hold its shape, dip an end into the paint and stamp it onto each banner piece. Your child can redip as necessary.

After the paint dries, flip over each banner piece and run a bead of glue along the top of each one. My son loved doing this and it really didn’t matter that he got a little sloppy (you might want to cover your work space before this step). Meanwhile, I cut string long enough to span each banner with a small gap between and extra for tying off at the ends. After the glue was in place, I came along and pushed the string into each bead of glue. We let it dry over night and by the next day we had a truly heart-warming Valentine banner to hang about the house.

If watching your youngest glue paper bags to his fingers, the table and the cat is not your idea of a good time, you might try one of these alternative methods. 1) Punch a hole at the top of each side of your banner pieces and run the string through the holes to create your finished banner. 2) Fold the top of each banner piece over the piece of string and staple the flap in place to create your finished banner. Which ever finishing touch your choose, pick one that works best with your child’s taste and strengths (and your mama mess index).

Page 123 of 144
1 121 122 123 124 125 144