Category: Tip or Treat

Black Tutu Easy Halloween Wreath

Black Tutu Easy Halloween Wreath

Halloween wreath

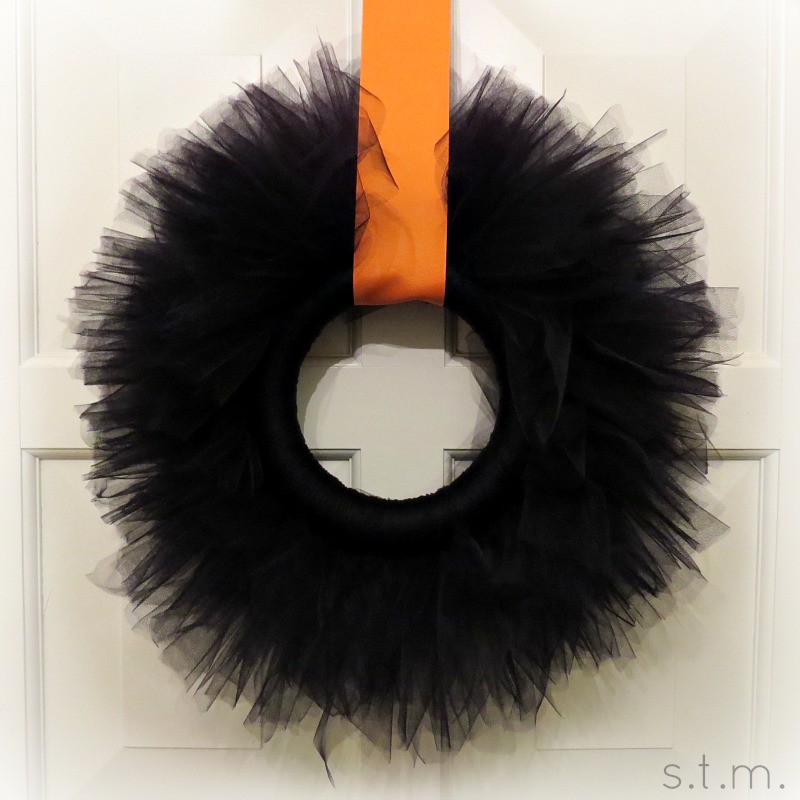
Recently I posted some great Halloween wreath ideas hoping to spark my own creativity in the matter, and I’m happy to report that I actually picked my poison (don’t mind my Halloween reference) and put together my new favorite (and only) Halloween wreath.

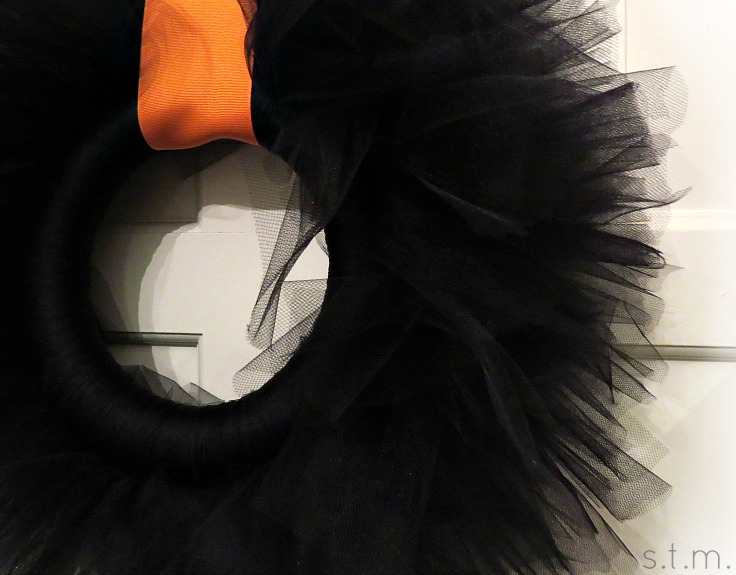
I love this simple black tutu wreath with the pop of orange ribbon and discovered that it was super easy to complete. It only took three ingredients, a pair of scissors and a few hours in front of the TV to make this fun project, and I am super happy with the result.
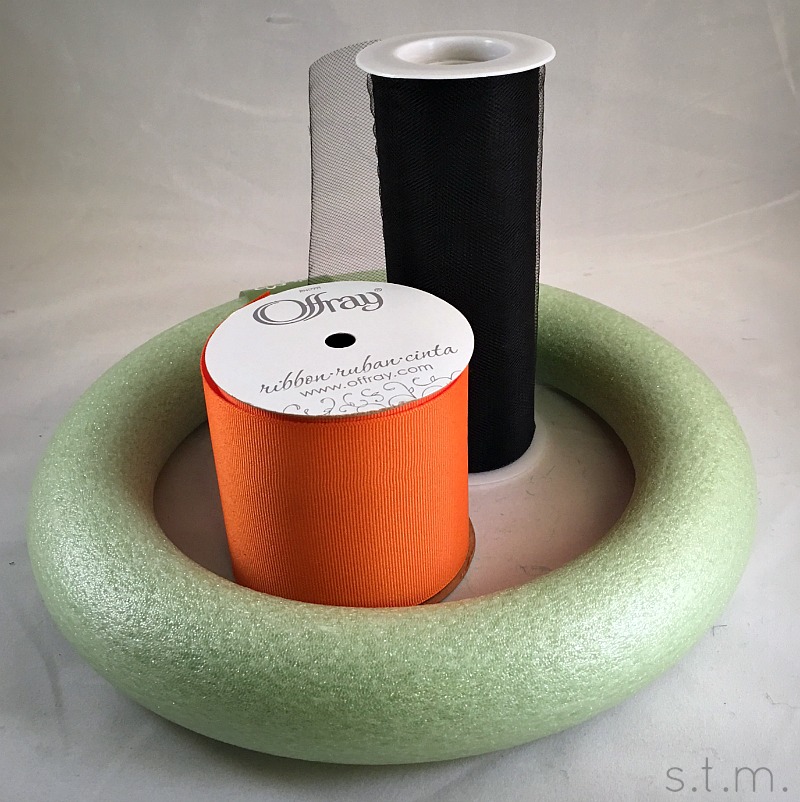
Halloween wreath

Materials:

  • 9.8 inch wreath form (or similar size)
  • 100 yards of black tulle (probably won’t use all of it)
  • orange ribbon
  • scissors

Directions:

  • Cut tulle in 18-20 inches long strips.
  • Layer two strips together and tie tightly in a knot around the wreath form. The double layer of tulle helps camouflage the color of the wreath form.
  • Continue to tie the strips around the wreath until the entire form is covered. As you tie on new strips, push the knots together so that the gaps between the knotted strips disappear.
  • When the entire form is covered, add a strip of ribbon to hang the wreath.
  • With the wreath hanging, you can fluff out all the pieces of tulle and trim any long or unruly pieces.

Yes, it’s that easy! I sat on the couch a couple of evenings and completed my cute little tutu wreath while watching football and Mission Impossible with my husband. It really is a no-brainer (the project, not my husband).

Halloween wreath

Spooky Life Given to Christmas Countdown Calendar

Spooky Life Given to Christmas Countdown Calendar

count down

Halloween is definitely one of my favorite holidays of the year, running a close third behind Christmas and Easter. I love to decorate, get spooky and celebrate with tricks and treats! I know you’ll think I’m silly, but one of the best things about getting my Halloween on is that this spooky day comes at the very end of the month, which means I can start decorating on the first and enjoy the orange and black all month long. It has a definite beginning and an end, which suits my creative self just so.

Since Halloween is a month-long celebration, it stands to reason that one should count down the days until the climatic celebration, and what better way to do so than with a mini calendar. I mean, we do it for Christmas, so why not Halloween. . . and Christmas is exactly where I came up with the inspiration for these cute little countdown blocks.

count down

I purchased this Christmas countdown project at Hobby Lobby a few weeks ago and after I got it home I decided I needed to get another for a Halloween version of this project. The regular price for the kit was $5.99 but I purchased mine at 40 percent off, so it was seriously affordable.

count down

I discarded all the Christmas stuff in the kit, just keeping the blocks and number stickers for the Halloween version of this project. The numbers are glittery black, so they are perfect for this project. One thing I discovered about the number sheets is that each sheet belongs to one block. If you adhere all the numbers from one sheet to one block and all the numbers from the other sheet to the other block, you will be able to count down all the days without a hitch (the number six doubles as the number 9).

To begin this project, I spray painted my blocks black and then picked out some cute Halloween paper from my burgeoning stash. I measured my blocks, cut my paper accordingly, inked the edges in black, stuck the self-sticking numbers to the paper squares and then adhered those to all six sides of the small blocks.

For the bottom block I used the same method as the small blocks, but instead of numbers I printed out a “Days Until Halloween” saying and stuck it to the front of the block. I didn’t bother with the bottom and back of the larger block because no one will see it, but if you feel the need to finish it all off go for it. I completed this project with a couple of cute do-dads and now we are happily counting down the days until Halloween. The hardest part about this project was deciding where to display it. Go figure.


Fill a Milk Jar for Pop of Kitchen Color

Fill a Milk Jar for Pop of Kitchen Color

milk jar

I love this milk jar turned Halloween treat, because it doubles as festive decoration and jar of yumminess perfect for your kitchen all month long. I swear I can’t keep my son’s hands out of it. Even if you don’t normally decorate your food prep place for this spooky holiday, it’s nice to add a pop of color to the room.

I originally purchased this particular milk jar filled with red, white and blue gumballs just in time for the Fourth of July, so I can’t really take creative ownership of this snappy idea. Soon after summer vanished, I soaked off the manufacturer labels and decided I could fill the empty container with whatever festiveness was coming my way.

Your local party supply store most likely stocks gumballs in every color, so picking something for your holiday of choice should be easy. If you don’t like gum, you can also fill it with those candy-coated colored chocolate balls or anything else holiday related. By the way, if you plan to use gumballs I suggest a jar with an airtight lid, because those little suckers can get hard as a rock when left out in the open (your dental insurance will thank me).