Category: This & That

A little bit of this and a tad bit of that

Mother of all Messes — My Craft Room

Mother of all Messes — My Craft Room

craft room

Hello Tuesday, I’m happy you’re here. If you tried to find your way to this little blog during the weekend, you probably received a really ugly error message. . . and so goes the world of technology when I happen to click one wrong button. *sigh* As you can see, Small Talk Mama is up and running once again and I’ll try (but can’t promise) not to maim my little site anytime soon.

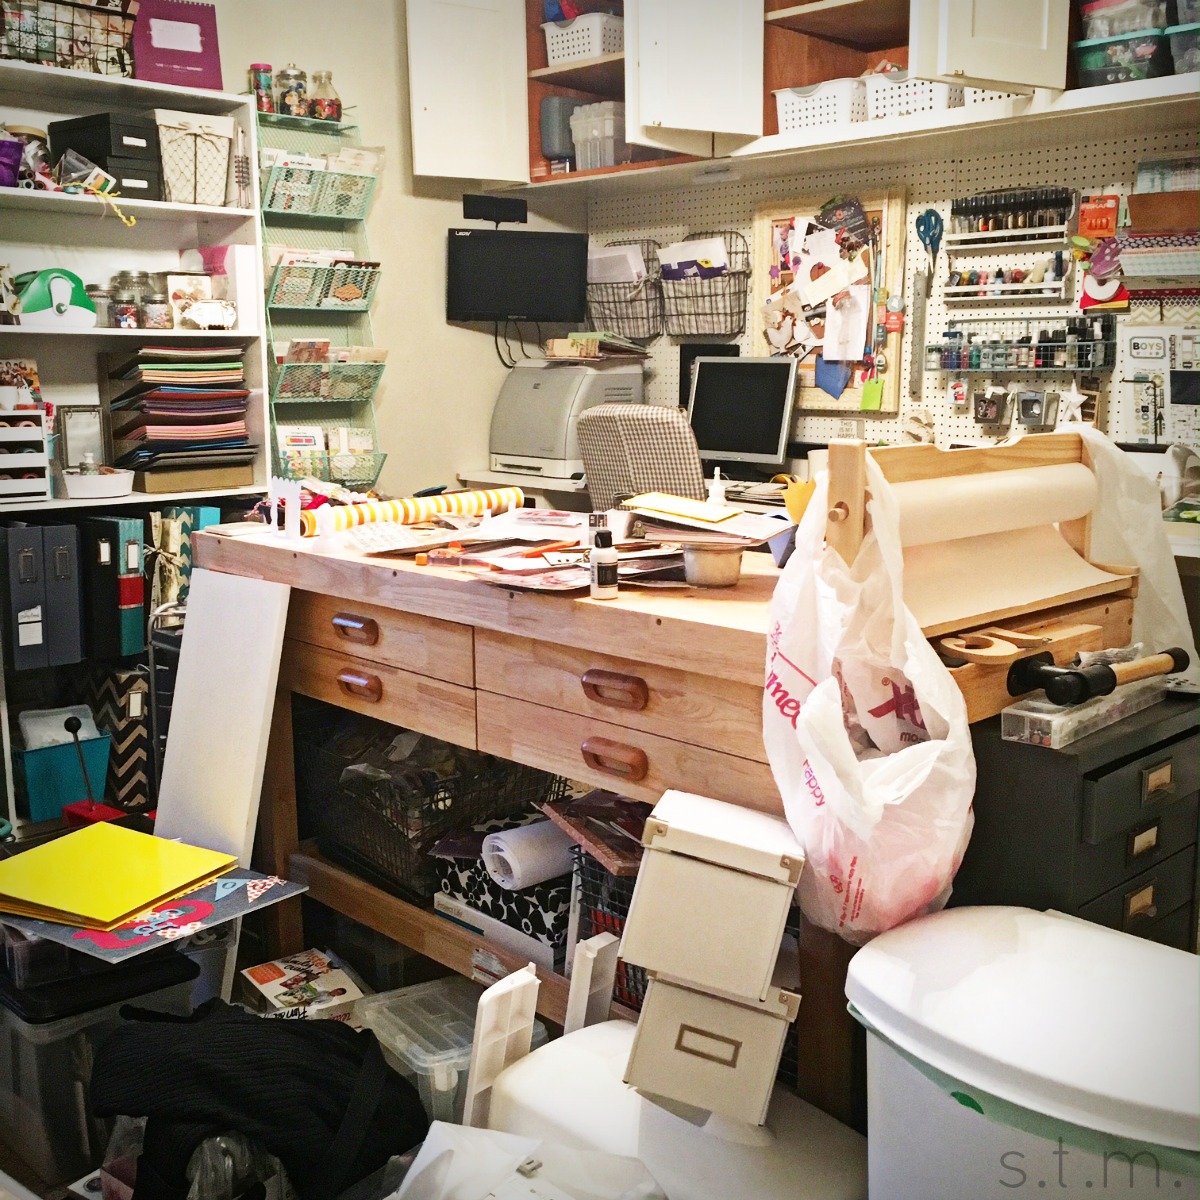
So with my blog out of commission for a few days, I decided to concentrate on more of my Spring cleaning and attacked the mother of all messes — my craft room.  Let me tell you, this room is usually in some state of disarray (even if I’m not in the middle of a project) because I have google eyes, glue, ribbon, fabric, paper and pictures stuffed in every little drawer, shelf and storage bin in the place. This room is full!

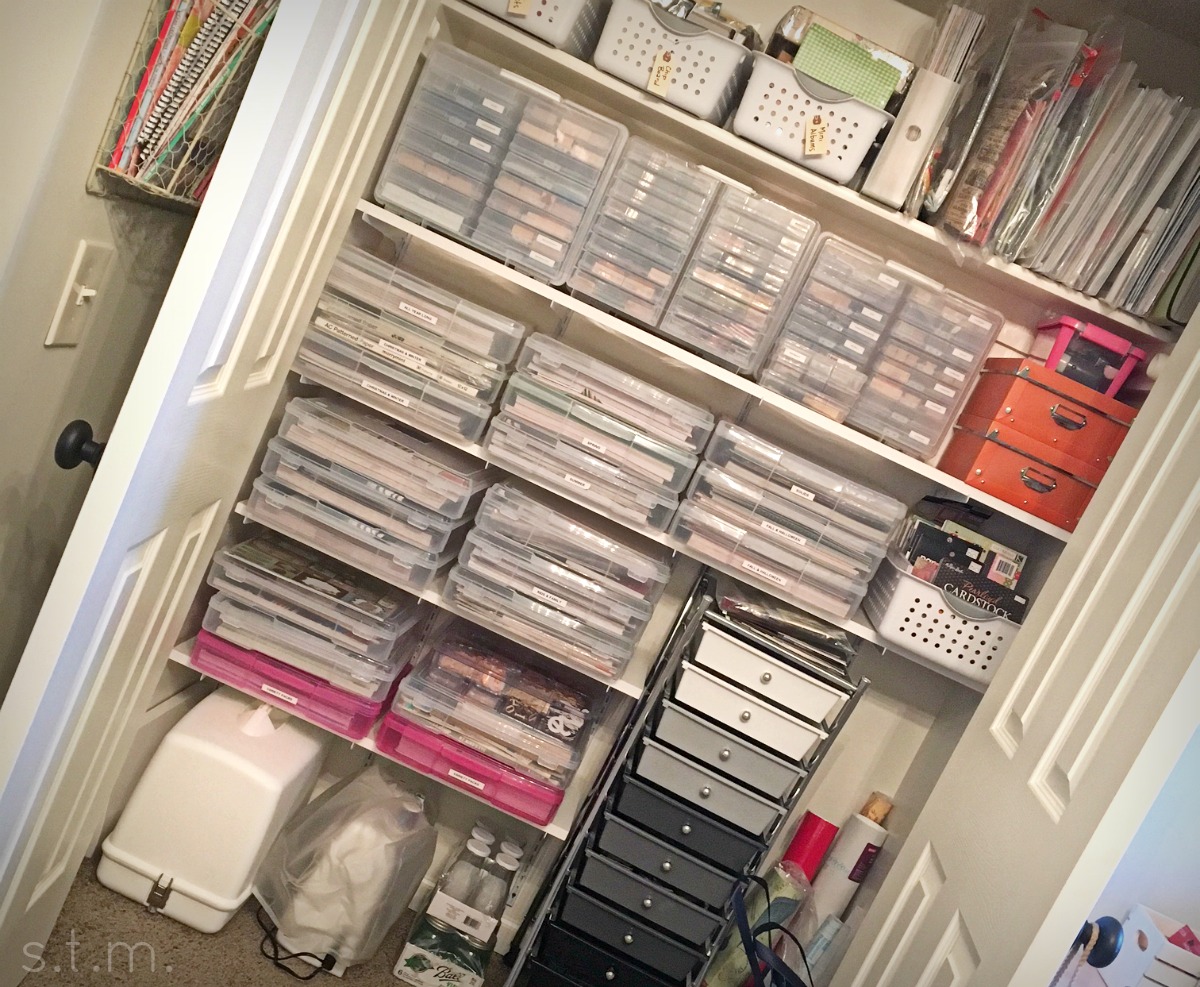
In an effort to become more productive and organized, I decided to give the whole room a flip-flop and throw away and donate lots of stuff in the process. I pulled down my paper craft supplies from the top cabinets and replaced it with the odds-and-ends crafting supplies that were in the closet. I don’t access that stuff as often, so it makes sense to put it out of easy reach. The closet now holds most of my bulky paper crafting supplies with a bit of room at the bottom for both of my sewing machines. Yes, I have two sewing machines. . . Is that a problem?

craft room

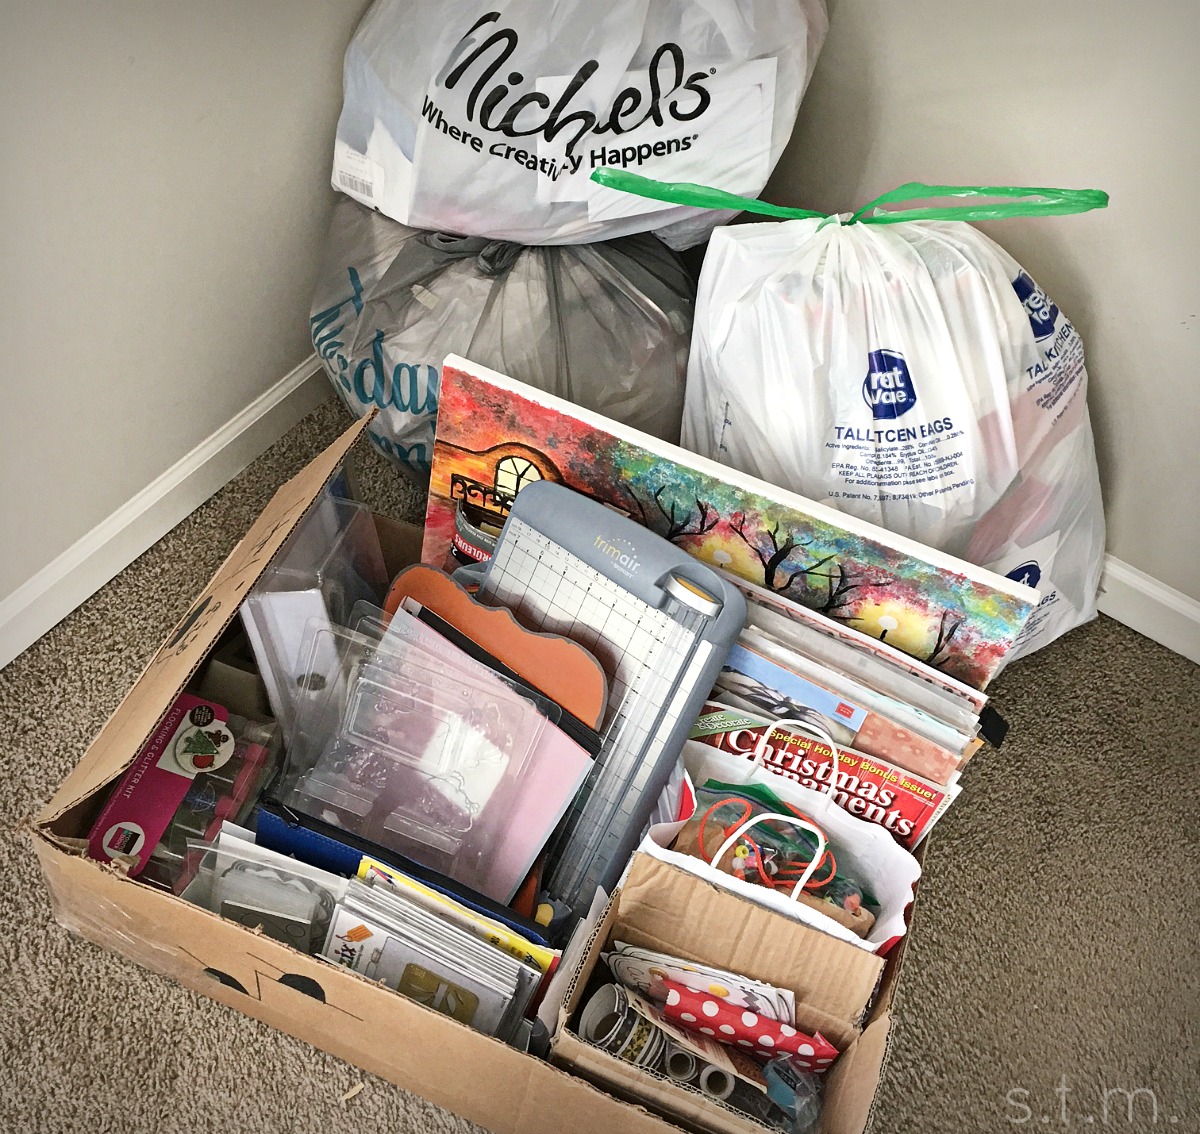
As you can see by the very top photo, this process was almost painful. In the middle of all the mess I almost threw in the towel, but I managed to work my way through the worst of it.. I still have a ways to go, but at least I can now see the floor. Below is everything that exited the craft room this weekend (I sure thought there would be more). I threw away three bags of trash and donated an entire box of fun stuff to the Hillcrest thrift shop. That takes me up to a total of nine items in my 40 Bags in 40 Days challenge. Yay!

craft room

The Air Fryer — Product Review

The Air Fryer — Product Review

air fryer

Well I asked for it and I got it — yes, that super sweet and ever so romantic gift of an air fryer for Valentine’s day. Many of you know I’ve been trying to lose weight and a couple of gals at Weight Watchers were praising their own air fryers a few weeks ago, so I decided it was time to give it a go. Thus, I requested one from my sweetie and he so kindly obliged (No husband hating here ladies. I was tickled that he bought it. . . along with the beautiful flowers and homemade treats).

Until the release of all the Black Friday ads last November, I never even knew this product existed. I mean these things were advertised everywhere, but I was skeptical then. . . and now I’m just a little less than wowed. Don’t get me wrong, I believe the product works exactly as advertised, but for the size, storage issues and limited meal quantities, I don’t think it’s a good fit for our family.

So let me explain. . . My husband did a bit of quick research online for air fryers and came up with the Farberware Oil-Less Fryer as a good choice. He paid $89.42 for it at Walmart, knowing it would be an easy return if I didn’t like it. It’s a basic model with temperature control and timer knobs and a handy removable basket for cleaning. I will say it was quite easy to clean, which really surprised me, but this sucker is large and takes up a lot of counter and/or storage space.

The first night I used the enclosed recipe book to make “fried” tilapia. I made three regular-sized fillets, but they had to overlap a bit in the cooking basket. I’m not entirely sure the recipe book is all that accurate, because the cooking time did not jive with the suggested fish cooking time printed on the outside of the fryer. Nevertheless, I followed the recipe instructions and came out with a mostly crispy coating on my fish, except where the pieces overlapped in the basket. In addition, my piece of fish was cold and undercooked at one end, probably the end under another piece of fish. While the meal wasn’t great, I blame the recipe book more than the fryer itself.

So I decided to give my gift another go and opted for “fried” okra — I couldn’t get it out of my head after my husband mentioned it, and I thought it would be a good test (especially since this summertime favorite is definitely not on my WW program cooked the traditional way). I didn’t consult the recipe book this time because the book only contains 25+ recipes and okra is not one of them, plus this mama can pretty much make okra in her sleep. I prepared the okra exactly like I would if I was frying it the traditional way (in a hot skillet full of melted Crisco — I mentioned I joined Weight Watchers, right), dipped in egg and cornmeal with some salt and pepper to taste. I was skeptical as I tossed the breaded okra into the fryer and set the timer. I just knew I would have a soggy mess to clean up afterward, but to my surprise it all cooked up quite nicely and I was able to easily wipe out the basket.

While the air fried okra had a crunchy layer around it, it just wasn’t the same kind of crunch. It was more like a hard shell instead of a well-proportioned crispness. How is that for vague? All I can say is that while the product seemed to perform as advertised, the air fried version of okra was definitely different than the much less healthy but much more yummy original version.

I do see the health benefits of the air fryer, but there is certainly a taste and texture difference in the meals cooked in this egg-shaped, large kitchen cooker. When I took into consideration the amount of space required to store this appliance, I decided the benefits did not outweigh the performance differences and storage issues for me to want to keep it.

Thanks hubby for the Valentine’s gift, but the air fryer is going back to the store.


Tear-Free Gingerbread Building

Tear-Free Gingerbread Building

gingerbread building

Along with a new year came the fulfillment of a fun family tradition here at The Three-Acre Wood — the eating of the gingerbread! As my boys commenced with the destruction and consuming of a weeks old gingerbread house (good thing we have dental insurance) I couldn’t help but think I should have written this post sooner rather than later, but as I’ve poured through so many plights of gingerbread making sob stories across social media I decided late is better than never. Maybe you will find your way back here before you embark on your next gingerbread building adventure.

We started building gingerbread houses, trains and other things several years ago, because it seemed like a fun family activity for the Christmas holiday. We then complete the tradition each year by eating the gingerbread on New Year’s Day. I’m not a fan of gingerbread anything, but I do manage to pick my way through a gumdrop roofline and sweet flavored shingles. 

gingerbread building

I always pick up a kit at a local craft store complete with cut cookie shapes, frosting, decorative candies and instructions. I’ve never baked a house from scratch, because. . . well, this is an article about a tearless tradition and a kit just seems like a better way to go. Even with a kit in hand, many of you can attest that building a gingerbread house can be a frustrating and tear evoking task, especially when the kids are eagerly waiting to adorn it with editable windows and sugar-covered roofs.

Through the years (and trial and error) I came up with a tear-free solution to building our beautiful brown baked houses, and it all comes down to planning. I’ve accepted that gingerbreading is not a spur of the moment task and so I peruse the calendar and plan ahead. The day before we plan to decorate, I assemble the house using the supplied frosting and house pieces. My little guy enjoys this step and it builds anticipation for the fun part of the process; besides, I can always use an extra hand to hold up walls and steady a roof.

gingerbread building

Before I begin, I select a sturdy structure on which to build, i.e. an upside down cookie sheet, stiff cardboard or, as in my case, the bottom to a Tupperware cake keeper. I start with a large end piece of gingerbread and slather it with enough frosting to stick to my platter. I then add frosting to two side pieces along the bottom and two ends. Don’t be stingy with your frosting, because it is the glue that holds this thing together. I then frost the bottom of the second large end piece and stick it in place to form the whole house without a roof. There should be frosting along all the bottoms and between every joint, except along the tops where the roof will meet the house (that will come later). If the house doesn’t seem secure, you might need to add a bit more frosting to firm it all up. Leave your house like this in a secure spot to dry for 2-3 hours.

Next comes the roof. Pipe a generous amount of frosting along all the tops of the house pieces and along one of the edges where the two roof pieces will meet. Carefully place your roof onto your house and have your family members run around wildly looking for something to wedge under the eaves to hold the roof in place. This year we used a tea cup with a small stack of business cards on one side and a Lincoln Log piece wedged against the mixer on the other. It’s not rocket science and anything that works is great; but if you don’t wedge the roof, the pieces will likely slide off before the frosting glue hardens. . . and someone (perhaps you) will shed those tears. Leave everything all rigged up like this over night and by the next day your gingerbread house should be solid enough to withstand gumdrops, peppermints and lots of little hands, without the wet eyes and frustration. Happy gingerbreading!

gingerbread building

Page 3 of 13
1 2 3 4 5 13