Tag: decorations

These Windows Won’t Scream

These Windows Won’t Scream

Room1

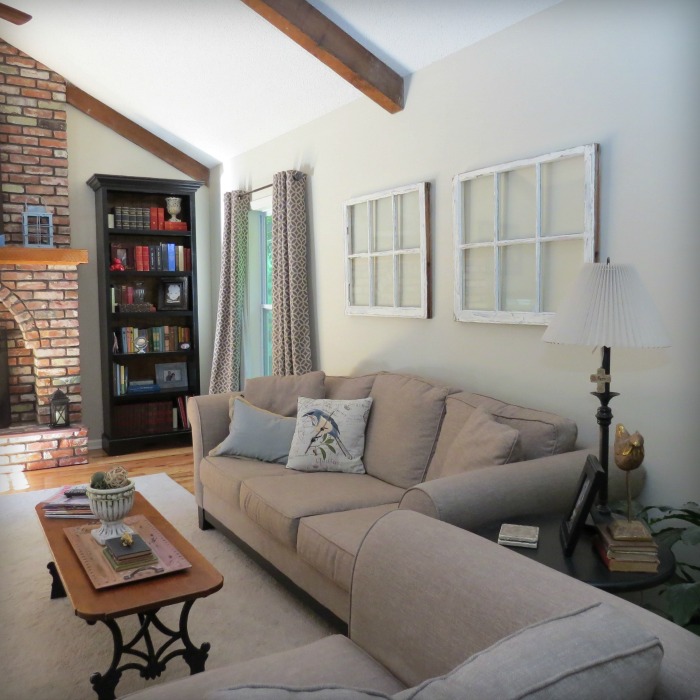
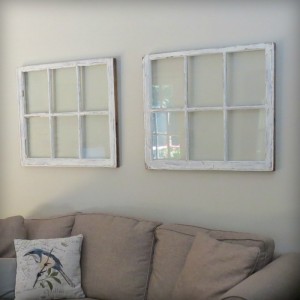
 Today I’m sharing my newest décor addition to our living room, and as long as you don’t ask me the same question as my three year old — “Why do we have windows where there are no cracks?” — we’ll get along great.

I knew I wanted basic old windows as an accent for the large blank wall above my sofa, but finding the perfect size, condition and price proved to be a bit more difficult than I originally imagined. So when I found these babies at The Rusted Rabbit for $17.00 each, I grabbed them up and carted them home.
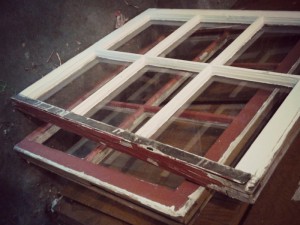
windowsA

 Why blank windows? Well, my focal fireplace wall is very busy with lots of photographs and pictures and I’m planning a photo collage for the opposite wall, so I thought simplicity here was best. I didn’t go with a mirror, because I didn’t really care for the reflection and there’s a large mirror in the entryway connected to this room. So there you have it; and here’s how I got it.

Materials:

  • black paint
  • pale bluish/gray paint
  •  off-white trim paint
  •  foam brushes
  •  electric palm sander with medium grit paper
  •  razor blade scraper
  •  dust mask
  •  old rags
  •  picture hangers
  •  Monkey Hooks

What I did:

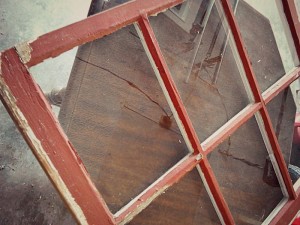
I worked on the red side of the windows, because I didn’t want to see any of that color through the panes and that saved me from painting both sides. To begin, I donned my mask — as hot and uncomfortable as it can be breathing in any dust is not healthy, especially when you don’t know the paint history of old pieces.

With my palm sander, I sanded both windows to knock off the peeling paint and dirt. I then wiped down the pieces with a damp rag and gave them a final swipe with a dry rag. (Tip:  Old, holey socks are great for furniture refurbishing.)
window1

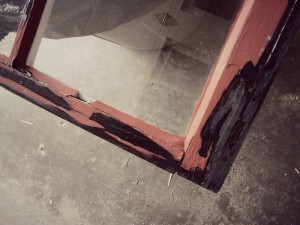
 Using the black paint and a foam brush, I not-so-strategically painted spots of the window. I didn’t cover the entire surface, because this was just the first of several coats.
window2

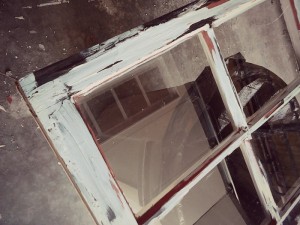
 After the black paint dried, I repeated the process with the bluish/gray paint (the accent color of my living room). I still did not cover the entire surface.
window3

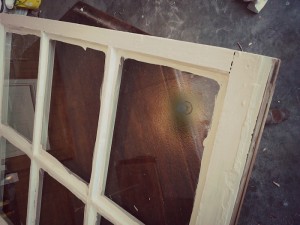
 After the gray paint dried, I painted a coat of trim colored paint (to match the trim in the rest of my house) over the entire front surface of the window. This is probably a good time to point out that I didn’t paint the edges of the windows, because they were still a beautiful, natural raw wood. After this first coat of trim paint dried, I applied another whole coat to entirely cover any red paint spots still bleeding through in areas.
window4

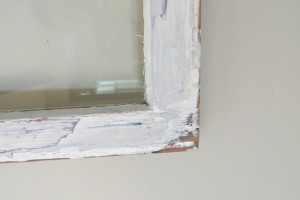
 After the last coat of paint dried, the fun began. With my palm sander I started taking off layers of color until I started seeing the many different colors and raw wood reappear.

The red paint was the most durable and the least desirable, so after everything looked as weathered as I wanted, I wiped down the entire thing with a rag. I then dipped a clean rag in some of the gray paint and lightly wiped it on some of the red spots to tone it down a bit.
window5

 I then scraped off all the paint on the panes with my razor blade knife, attached two hanging loops to the back of each window and put them on the wall with Monkey Hooks (in my opinion, the best and easiest way to hang heavy items on your wall).
room2

 I love how these windows look and think this technique is a great way to decorate a large space without screaming for attention.


A Bunny Banner All Your Own

A Bunny Banner All Your Own

banner2B

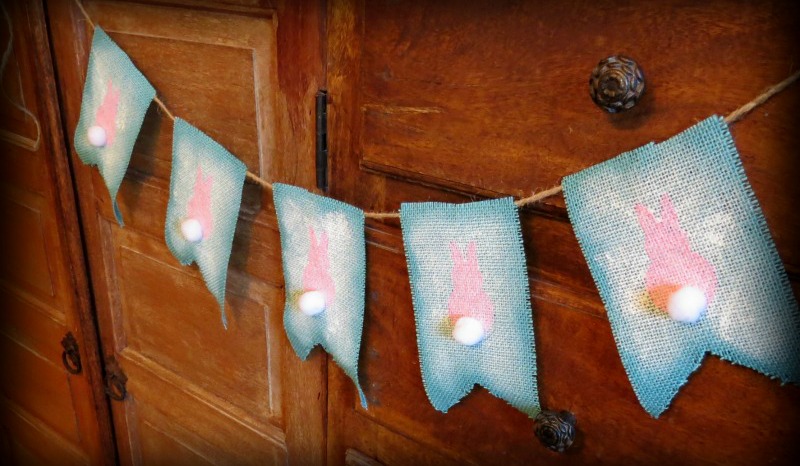
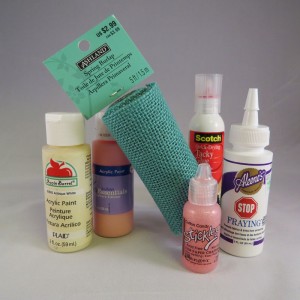
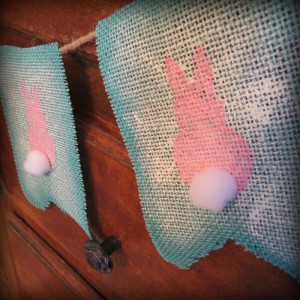
Yes, Easter is just a few days away, but you still have plenty of time to whip up this cute little bunny banner just in time for the holiday. . . especially if you use an inexpensive roll of burlap as your base. Below you can see the basic supplies I used and some are optional, but the best way I’ve found to create a quick banner is to stay clear of large expanses of material and focus on burlap that is more user friendly.

bunnybannersuppliesMaterials:

  •  Roll of unwired, unfinished burlap
  •  Liquid Fray Stop
  •  Off-white/white acrylic paint
  •  Pink acrylic paint
  •  Bunny template (pdf file)
  •  Pink Stickles (optional)
  •  Medium white pompons
  •  Twine or jute
  •  Fast drying craft glue
  •  Scissors
  •  Foam brush
  •  Small bristle paint brush


Directions:

  1.  Cut five strips of burlap from your roll. My roll was four inches wide, so I made each strip eight inches long (Making your length twice as wide as the width is a good rule of thumb).
  2.  Cut a triangle out of the bottom of each of the strips to form the banner shape.
  3.  On the back of each burlap strip, run a bead of Fray Stop around all the edges. Don’ put it right at the edge, because you want just a wee bit of fraying to occur.
  4.  After the Fray Stop has dried, turn your burlap pieces back over and use your foam brush to apply a light coat of white paint to the front of each piece — do not go all the way to the edges.
  5.  Print off a copy of the bunny template (pdf file) on a piece of card stock paper, if you have it. Cut out the template to create a bunny shape in the middle of your sheet of paper.
  6.  After your white paint has dried, center your template on a burlap piece and using your foam brush dab the pink paint on to create the bunny shape. (Use light coats of paint and add as necessary, but make sure to use a pouncing motion instead of a brushing motion.) Repeat this step for each of the banner pieces.
  7.  After the pink paint dries, this next step is optional but I found that it really helped draw attention to the little rabbits. I used pink Stickles and a small bristle brush to cover the pink area with a bit of sparkle. I chose Stickles instead of glitter just for the ease of use. Glitter tends to stick to burlap in all the wrong places.
  8.  After everything is dry, use the quick-drying craft glue to adhere your white pompon bunny tails.
  9.  When the tails are dry (yes, there are a lot of “watch it dry” moments in this project), slightly fray the edges of each of your banners.
  10.  Lay out your banner pieces with desired spacing and cut a length of twine/jute to span the distance, adding a foot or so at each end for hanging.
  11.  Flip over each banner, run a bead of quick-drying craft glue along the top back edge of each banner and lay your twine or jute in the glue to dry. And yes, that’s the last time you have to watch it dry, because you’re officially finished. Just hang and enjoy!


banner1banner3


Shared at:
What’s It Wednesday @ Ivy and Elephants
WWAW @ Green Willow Pond
Pin It Monday @ Pursuit of Functional Home
Wow Us Wednesday @ Savvy Southern Style
That DIY Party @ DIY Showoff

Cheap and Easy Holly Hangers

Cheap and Easy Holly Hangers

hollyhanger1hollyhanger2

I’m going to let you in on a little secret of mine, because who doesn’t love cheap and easy. Whoa now, I’m not sure you’ll find this little tip quite that interesting, but if you are looking for an inexpensive and extremely quick way to hang holiday decorations on mirrors and pictures, then you’ve come to the right place.

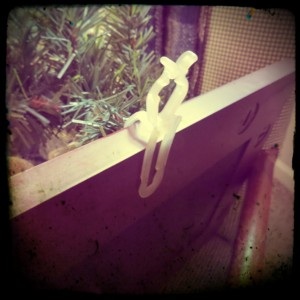
A few years ago while my husband was sorting outdoor lights and I was festivizing the living room, I decided to hang a cute little wreath (pictured at left) in front of the mirror over the fireplace. I didn’t know how best to go about this without scratching the mirror or poking holes in the wall, until. . . until I spied an orphaned light hanger that had fallen off my husband’s project. Speaking of lights, one suddenly went off in my head.

I took this one little plastic hanger, you know the kind you can buy for cheap that attach to outdoor lights and slide under roof shingles or clip on gutters, turned it upright and attached it to my wreath. I then simply slid the part that is supposed to go on the gutters or shingles over the top of my mirror. It was a perfect fit!

Obviously if you have a seriously chunky frame on your mirror, the clip won’t fit; and in that case I’m going to leave you hanging (no pun intended). But for most simple frames, this technique should work fine. Also, if the little “rabbit ears” on the clip stick up above your wreath or bow, simply trim off that portion of the clip.

Page 2 of 3
1 2 3