Tag: celebrations

Saturday Sparks — Patriotic Picnics

Saturday Sparks — Patriotic Picnics

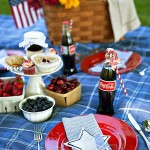
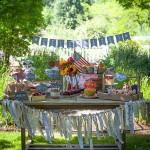
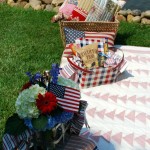
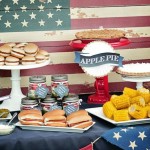
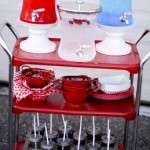
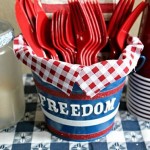
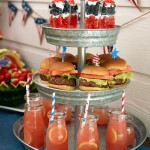
Who doesn’t like a great patriotic picnic this time of year? And today I’m sharing a bit of inspiration to kick start your next family gathering just in time for Independence Day. So take a look at all the stars, stripes, pinwheels and red, white and blue to start planning your picnic today.

5a7c4ddcdde1178b8db64674d8793696f6a567ef2754169fae1e7d05b73569919a8b6e0af61e18620943d34e6c16056327bf14e849ed0c29afacbb6fd5414896wagon16aaee0495d727f3e784c351e4b87397tablespread9980484009141a96eb1669e1f85944b0b3783f0c6bcf55214c0707d190d7a4a37f9252cab3e65ef72b42520f0f4033e8eaef3794606b8e9cf64183ddcb25f75e3131737bb6152544b37462c3f0c21e34

Cute Little Chick Pic

Cute Little Chick Pic

Since my husband won’t buy me an actual peeping chick for Easter (something about coyotes and bobcats eating them or something), I decided to make my very own. I needed to dust off my Cricut machine anyway and I am always looking for a reason to pull out my ever-growing collection of washi tape.

chickpic2

 This is a quick little project to create, and as long as you have the supplies on hand it can be really inexpensive to complete. Here’s what you’ll need to hatch your own little chick pic just in time for Easter day.

Materials:

  • Cricut machine
  • Celebrate With Flourish“ Cricut cartridge (or suitable substitute)
  • Yellow piece of card stock
  • White piece of card stock
  • Variety of coordinating washi tape
  • Coordinating ink pad
  • 8×10 photo frame
  • paper cutter

Directions:

    1. Using your Cricut cartridge and machine,  cut a six-inch chick out of the center of the yellow cardstock. You actually just want to use the paper with the shape cut out of the middle, so just set aside the chick shape and find some other use for it later.
    2. Cut down the yellow and the white sheets of cardstock to fit in the 8×10 frame, making sure to keep the chick centered on the yellow piece.
    3. Ink the edges of the chick shape on the yellow cardstock to help give it definition.
    4. Adhere several strips of washi tape straight to the white cardstock in an area larger than the centered chick shape. I placed mine at an angle for added interest, but you can do it however you like.
    5. Place the yellow cardstock on top of the white cardstock and stack them in the picture frame so that you have a colorful little chick pic all your own. Note:  If you have any pieces that are not connected to your main image, like the little gap between the chicken legs, you can adhere those straight to your page before you place your artwork in the frame.

Yup, it doesn’t get much easier than that to create an adorable Easter work of art. You can also use other silhouetted images like bunnies, baskets and eggs if you want to experiment with different looks. Happy Easter!

Shared at:
That DIY Party @ DIY Showoff


Saturday Sparks — Egg Dying Ideas

Saturday Sparks — Egg Dying Ideas

With Easter just a over a week away, I thought a bit of egg dying inspiration was in order for the day. I’m sure you’ve seen some of these ideas before, but I’ve compiled several techniques all in one spot so that you can pick and choose what might work best for you (and the little ones). That being said, if you have a creative way with Easter eggs I welcome you to share.

9382671669ab57f2a643dbf8f19229dc 9873e94200d20914ed004c9ebdfc7094 f974786c85d908457eea184e27da65a9 8b51e3e1a37a6411372b3351c04facae 482ff6d60fc1e2a8e39430a46bde12ec 801bf4df4aad3480db422034020ea282
29538aad56c098eddb4bcc31bf24aa72 eggs 0b1cfe10c16b808604d1fabd67b549a2 d00c8c4ccd97ec8ee41ee3e8e2ff2544 DIY-Colorful-Easter-Eggs for you 11bda0a3dcb3e0b431000a58b5d11491
Page 10 of 13
1 8 9 10 11 12 13