 Last year I created this fun little card project as a guest blogger for NWA Motherlode. Now I’m posting it here at Small Talk Mama so all my new readers can enjoy this great project and share a little love this Spring with these “seedy” cards.
If you want to enlarge any of the photos, just click on a specific image to enlarge it.
Materials:
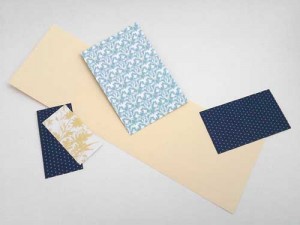
- 3 sheets of coordinating decorative paper – 6 x 6” or larger
- 1 sheet of coordinating cardstock – 8.5 x 11”
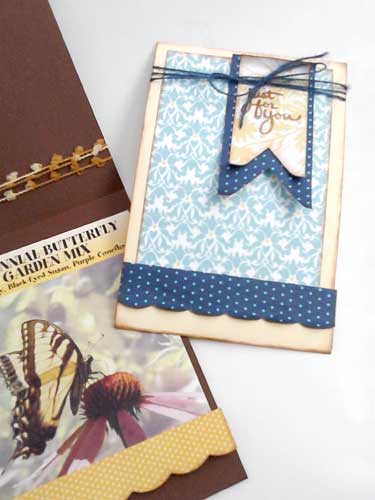
- 1 package of spring seeds – traditional size only
- stapler and staples
- paper adhesive of your choice
- liquid glue
- pencil
- scissors
- paper cutter
- decorative edge scissors or punch
- small spring greeting stamp or rub-on
- 3 ft. of scrapbook floss, thin ribbon or embroidery thread
- scoring tool of your choice
- colored inkpad for stamping and inking the edges of your paper (optional)
Directions:
- Let’s begin by cutting all of our paper to size.
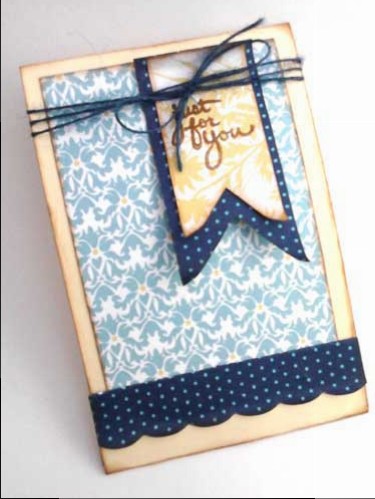
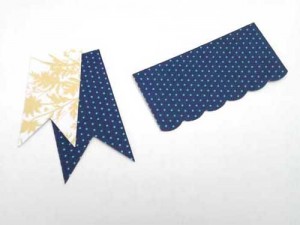
For this project, I am using three decorative papers from Teresa Collins’ Everyday Moments 6×6 pad and a simple yellow cardstock.Cut the cardstock to 3 ½ x 11”Cut the large front piece to 3 x 4 ½”Cut the paper that will be scalloped to 3 ½ x 2”Cut the first larger banner paper to 1 ½ x 3”Cut the smaller banner paper to 1 ¼ x 2 ½”

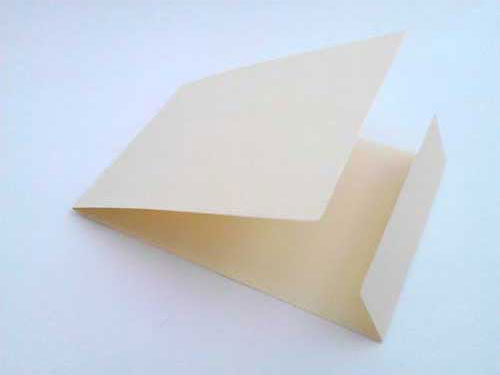
- Next, let’s score and fold our cardstock.Score from the left short edge at 4 ¾” and again at 10”
I use my paper cutter with the blade up and an embossing pen. I run the ball of the pen down the grove in my cutter to create a nice clean score. But believe me, many objects will work for scoring. Use what you have – I’ve used screws, bone folders and stickpins.Fold along those two scores and you should get a large matchbook shape.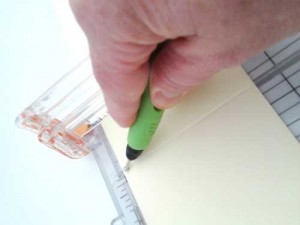

- Next use your decorative edge scissors or punch and cut a design along one long edge of the paper measuring 3 ½ x 2.
- Cut the two smaller remaining papers into banners by cutting a triangle out of one of the short sides. I just freehand this step for a cute imperfect look.


- Ink the edges of all your papers, including all the folded edges of your cardstock (optional). Inking your paper covers the white cut edges and adds another bit of dimension to the finished project
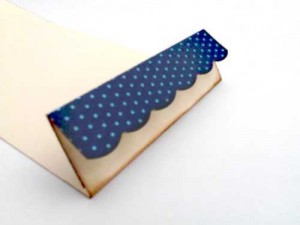
- Next place the paper with the cut decorative edge over the smallest flap of your cardstock so that only about a half to three-quarters of the cardstock is peeking out under the scalloped edge of the decorative paper. Now fold the decorative paper over the small cardstock flap and adhere it to that flap on the inside only.
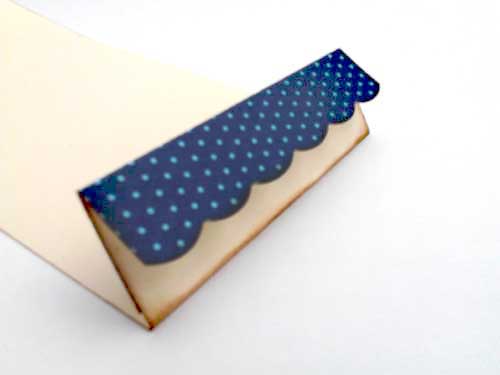
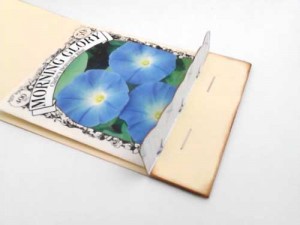
- Place your package of seeds inside your cardstock where matches would typically go. With the front of the scalloped paper out of the way, staple the seeds into the card with two staples going through the small cardstock flap, the seed packet and the back of the matchbook. Then adhere the scalloped paper down, covering the staples completely. (If your scalloped edge has trouble staying down, try a dab of liquid glue.)
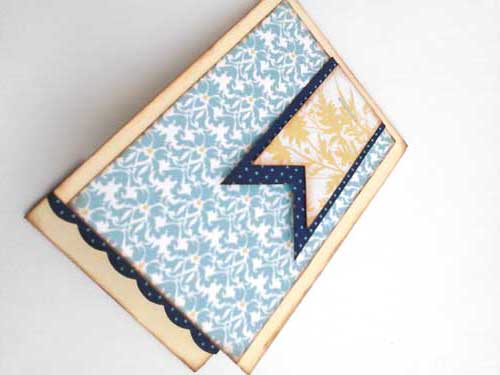
- Next adhere the smaller banner to the larger banner with the top edges lining up. Then adhere the banners to the last piece of decorative paper you cut with the top edges lining up and a bit off center. Staple all three pieces together with one staple about a half inch from the top of the papers
- Adhere this grouping to the middle front of the matchbook cover (the bottom of the largest paper should line up with the bottom of the matchbook cover flap).

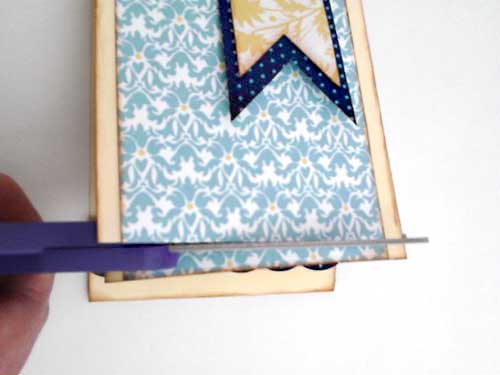
- Next trim the cover flap so that it fits into the small bottom flap of your card, just like a matchbook works. This trim will be different for everyone, depending on where you stapled in your seeds. Check to make sure everything fits nice and flat.

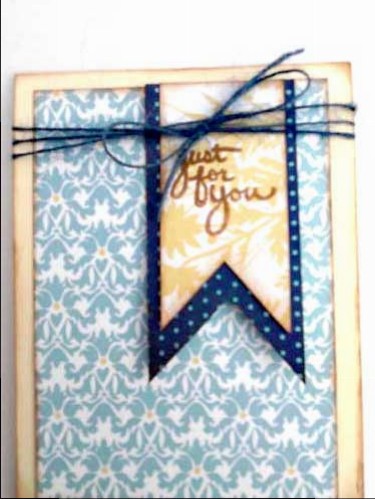
- Open the flap again and stamp, rub on or write a cute spring greeting on your smallest banner below the staple. I’m using a “just for you” stamp from my collection
- Now wrap your floss, thread or ribbon around the front flap of the card (banners, staple and all) approximately three times and tie with a bow. Add a drop of glue under the bow to keep it tied and in place.

- After the glue dries, use the edge of a pencil to roll the top of the banners and the tails of the banners just a bit to give it a little dimension. You can also curl up the scalloped edge of your bottom flap if you choose
- Insert your large matchbook flap back into place and you are finished. You now have a cute (and useful) spring greeting card for a special friend or family member.