Wow, summer decided it was not going quietly this weekend as we posted temps in the 90s here in the Midwest. My son got out of school three hours early on the first day of fall last Friday, so we headed to the zoo. . . let me just say I’m awfully thankful for the indoor penguin exhibit!! Tonight promises rain and much cooler temps, so it should finally start feeling like autumn, at least for several days.

Okay, so I just had to share a fun penguin pic with you from our summer-feeling fall day at the zoo. We pretty much had the place to ourselves.
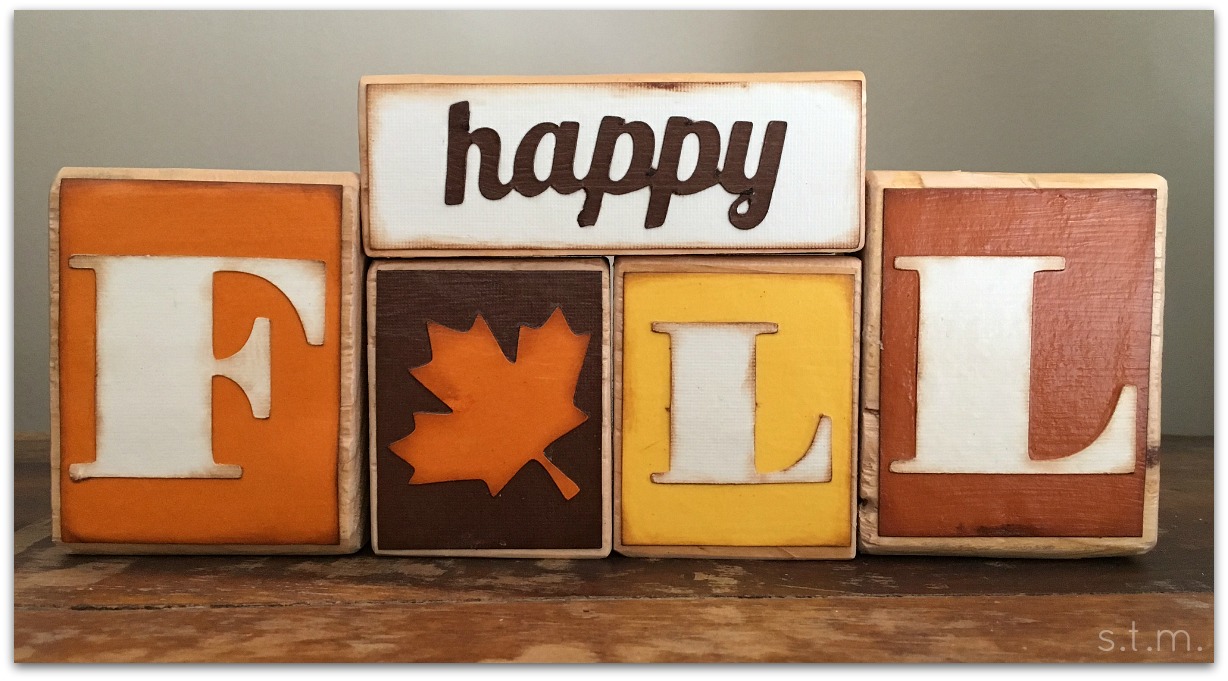
As I have been slowly pulling out my autumn décor, I came across this fun little fall blocks project I made at one of our awesome MOMS Club® events. My friend, Stephanie, did all the legwork for this one, so all we had to do was ink, paste and Mod Podge. That’s about as easy as it gets for such a cute little craft. Thanks, Stephanie! Today, I’m going to share the process with all of you so that you can assemble your own at home, but there will be some sawing involved, because I’m afraid Stephanie doesn’t come with the directions.
Supplies Needed:
- 1 2×4 piece of wood (one 8 ft length will make several of these projects)
- 1 2×2 piece of wood (one 8 ft length will make several of these projects)
- Coarse sandpaper, with or without an electric sander.
- Letters (you can buy them precut, use a Cricut machine or even store-bought stickers) — You will need an F and two Ls. You will also need the word “happy” or enough small letters to spell out the word.
- Paper leaf (you can buy this precut, use a Cricut machine or even store-bought stickers)
- Coordinating background paper
- Mod Podge
- paintbrush for applying Mod Podge
Directions:
- The first step is to cut the pieces of wood down to the correct size. Cut the 2×4 down to the following sizes: two pieces 2 3/4″ wide, two pieces 2 1/4″ wide and 2 3/4″ tall. Note: these were sizes for the letters and leaf we used, so you can measure your letters and cut accordingly, if you choose.
- Next, cut the 2×2 to size. Our piece was about 4 1/2″ long, but measure the distance of your other blocks pushed together and check your measurement before cutting. Naturally, if you cut your 2×4 blocks different sizes, this block will also be a different size.
- Once you have all your blocks cut to size, use your sander/sand paper to round off all the edges and corners for a smooth finished look.
- This step is optional, but I like to ink all my edges for a bit more interest with a coordinating color. Do this before you start pasting down things, because you won’t have any luck after.
- Now it’s time to start assembling your blocks. We used Mod Podge on the backside of our paper, letters and leaf as an adhesive. Once everything is pasted down, put a nice coat of Mod Podge on top of everything. This will make sure all your elements stay put and add some protection.
- After everything dries, you are ready to welcome autumn with your cute handmade blocks!
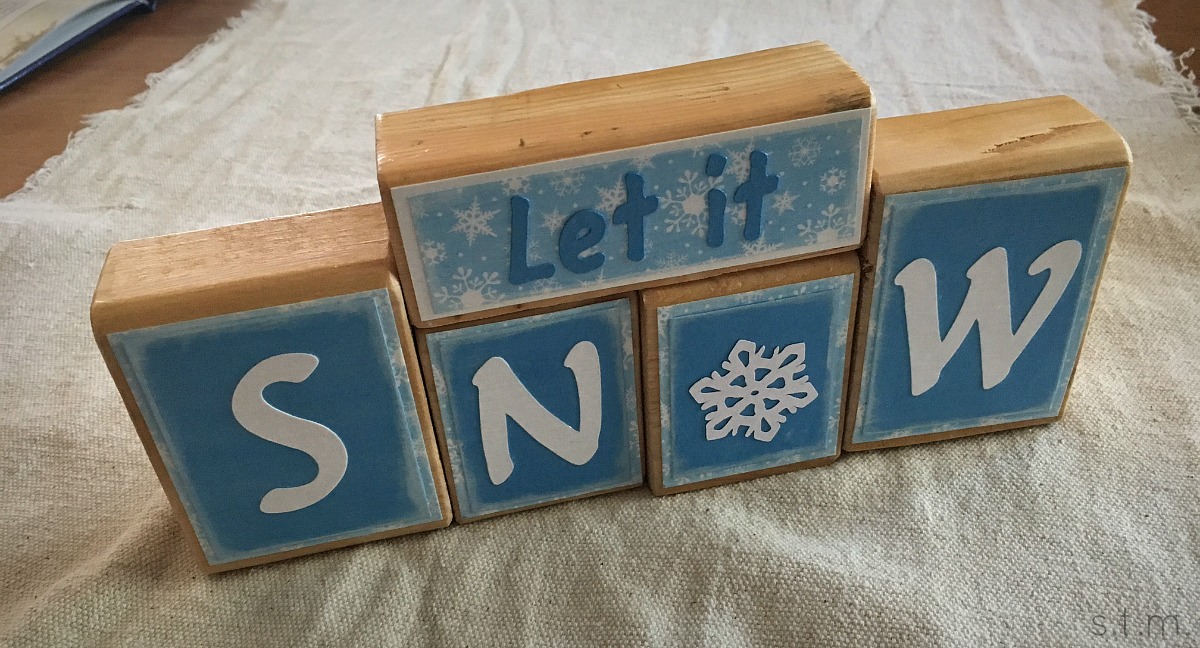
Okay, so here’s the winter twist I promised for this project. If you want your blocks to pull double duty, simply add a backside that nods to cooler weather. Use coordinating papers and letters and add a little snowflake to welcome winter with just a simple flip.
Very cute! This would make a nice gift for a teacher.
Oh my goodness, that would be a cute teacher gift. I might just have to make another.